The Camaro Club (UK)

Online Community for all Camaro Owners and enthusiasts
It is currently Fri Nov 01, 2024 2:42 pm

All times are UTC


Post new topic Reply to topic  [456 posts ]  Go to pagePrevious167891046Next
Author Message
 Post subject: Re: '79 project
PostPosted:Wed Jul 18, 2012 2:50 pm 
Offline
Big Block
User avatar

Joined:Tue Feb 23, 2010 12:40 pm
Posts:3245
Car Details:'79 Camaro, 350 V8
Location:South Bucks
Alritey so a few updates!

Paint arrived a few day ago :) got really looked after by the company - got many, many litres, plus primer, loads of masking tape, gloves, wipes, tack cloths, polishing heads, polishing compounds - a real end to end system, so super chuffed!

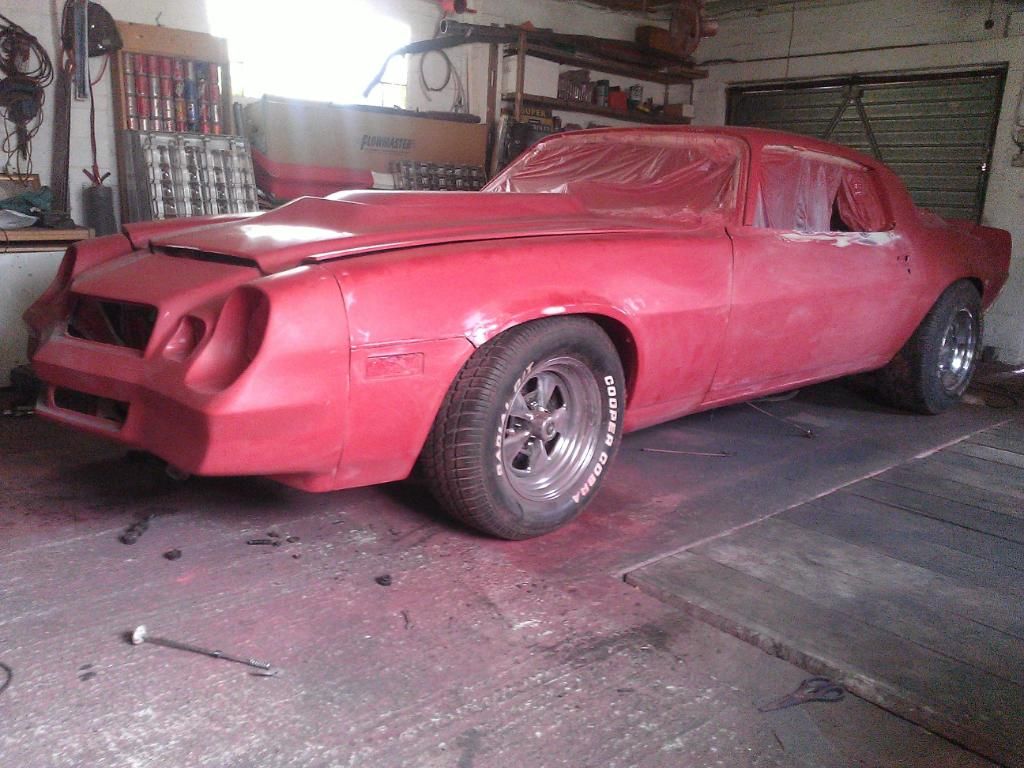
Now i'm in the middle of stripping down the paint to the factory primer / colour. Have chemically removed a few layers, here's the paint job history:

Coat 1:
Factory etch
Factory primer
Factory colour (Gold)

Coat 2:
Black colour

Coat 3:
Primer
Blue colour (that nice shelby cobra / chevelle metallic blue)

Coat 4:
Primer
Red colour

Coat 5: (my paint job)
Primer
Red colour

So i stripped chemically down to the 3rd coat and am blocking down as much as possible. I want to keep the factory e-coat on there as i wouldn't be able to replicate that quality.

A few more days and it should be done, in 320, ready for primer. I will have a few bits of filler work to do, only light though so bought some stopper as it'll only be for minor imperfections.

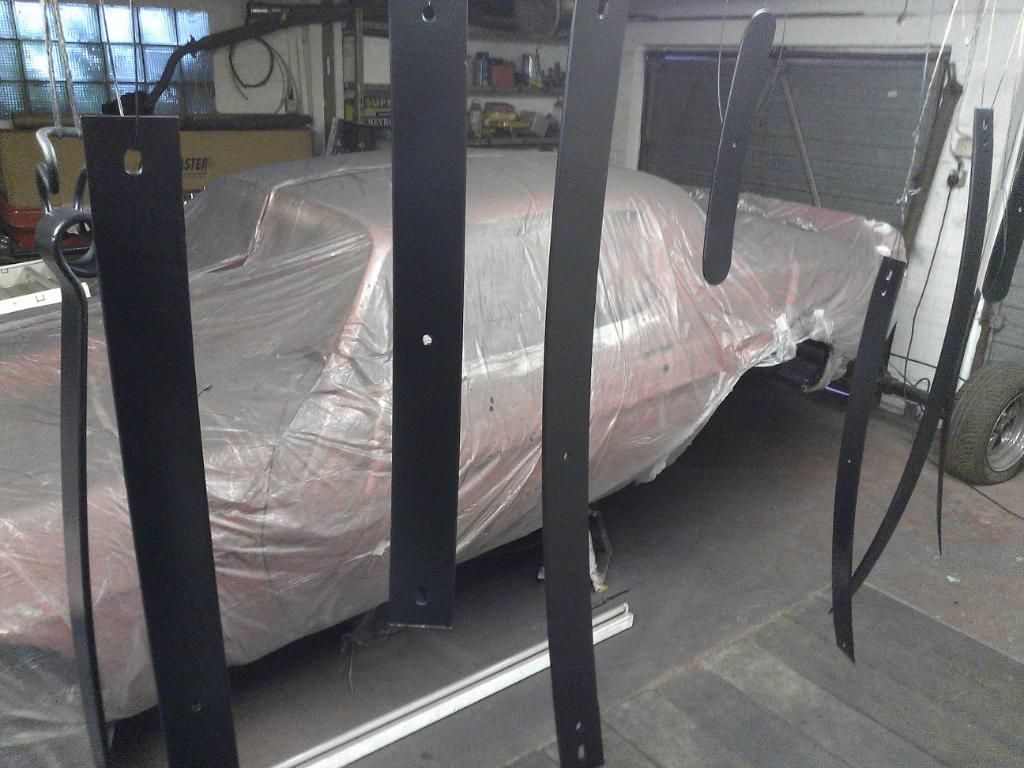
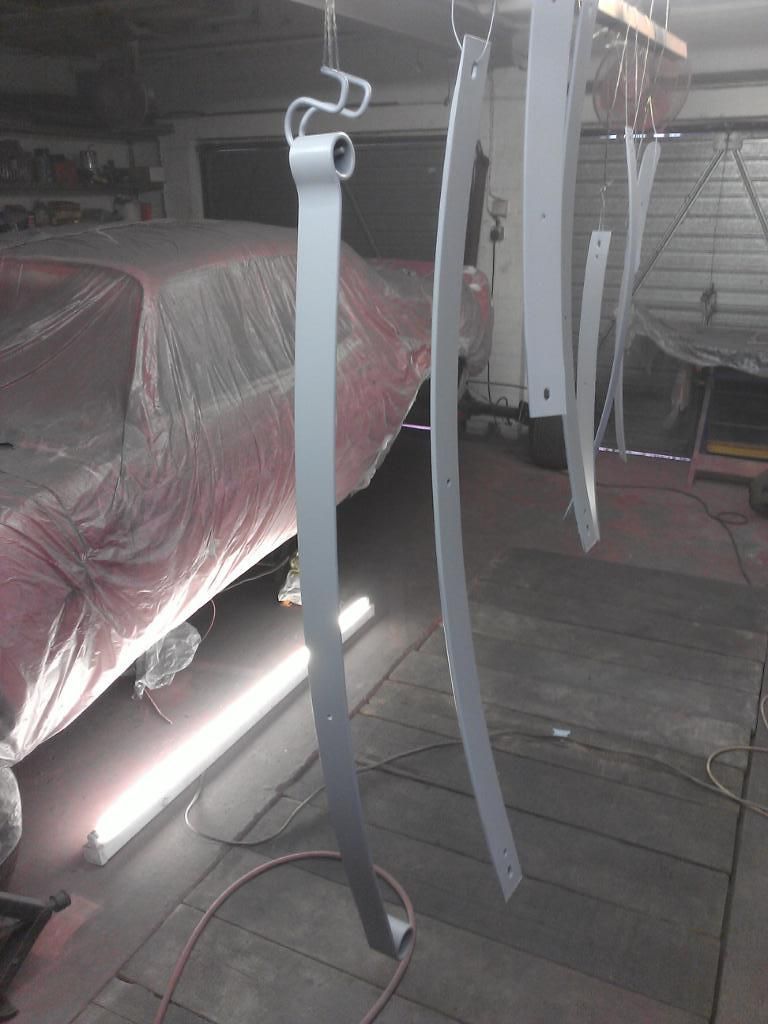
Underneath is done, all in raptor liner now. Rear suspension is all done, stripped and repainted each spring :cry: , did the herb adams front spring eye mount, new poly bushings all round, new shocks, and a new stance!

Front suspension also got taken apart, having the parts blasted and powder coated, all new polybushings going in too (whenever they get back to me - playing the waiting game as i'm waiting for the bushings to be pushed out before the powder coater gets them :( ). Off to pick up some new shocks from Rocky in about 30 minutes :)

Think that's about it, here's the interesting part - some pics!


Stripped leafs back to bare metal, then etched then topcoated
Image

Image

Image

_________________
How to post pics: When writing a message, scroll down and use the "attach file" option. Where possible, a photo sharing service can be used such as Flickr, Imgur etc. The image location (usually ending in .jpg) can be copy and pasted between the ][ brackets that appear when you click the 'Img' button (you can find this button at the top of the message box).

How to post youtube vids: Click on the 'youtubeHD' button at the top of the message box and in the middle of the ][ brackets that just appeared, copy and paste everything from the youtube web address that appears after the = sign i.e if this is the url: https://www.youtube.com/watch?v=K2cNqaPSHv0 just copy "K2cNqaPSHv0").


Top
   

Re: '79 project

Sponsor

Sponsor
 

 Post subject: Re: '79 project
PostPosted:Wed Jul 18, 2012 3:27 pm 
Offline
Big Block
User avatar

Joined:Mon Feb 09, 2009 12:41 pm
Posts:2451
Hi Ray, glad to see that the paint company came through with the goodies at the end of the day, I bet that's a relief :thumbup: You'll be a dab hand at this painting malarky at this rate, if you got any queries just give me a shout in the afternoons

cheers...Nige

_________________
Too much power...not enough hands!!


Top
   
 Post subject: Re: '79 project
PostPosted:Fri Aug 17, 2012 1:26 pm 
Offline
Big Block
User avatar

Joined:Tue Feb 23, 2010 12:40 pm
Posts:3245
Car Details:'79 Camaro, 350 V8
Location:South Bucks
Cheers Nige,

Yes it's been a long situation that's for sure. When all the stuff came through there was no painter hardener though, just arrived this morning!

So as far as the project goes, have replaced the body bushings to poly, all the front suspension is back in, powder coated and new polybushings all round, including on the front sway bar. Fuel tank is done too, just need some new pipes, hopefully will have next week.

Paint stripped the whole car now, sanded in rough grit (60). Found out the passenger door had been in a nasty collision. Door had been attempted to be fixed, you can see where they've pulled it and hammered it in parts, but still some big dents in it and very wavy. Was a lot of filler on there covering it up. So that's thrown a spanner in the works. annoyingly a new door skin is a good price out in the states (~£50) but with delivery it's between £150 and £200 :( So going to try and straighten it out, if not, then new skin. Once done, then working my way up the grit, into primer, final sand, then, should be, the paint :o

Now for some pic's!

Image

Image

Image

Image

Image

Image

Image

_________________
How to post pics: When writing a message, scroll down and use the "attach file" option. Where possible, a photo sharing service can be used such as Flickr, Imgur etc. The image location (usually ending in .jpg) can be copy and pasted between the ][ brackets that appear when you click the 'Img' button (you can find this button at the top of the message box).

How to post youtube vids: Click on the 'youtubeHD' button at the top of the message box and in the middle of the ][ brackets that just appeared, copy and paste everything from the youtube web address that appears after the = sign i.e if this is the url: https://www.youtube.com/watch?v=K2cNqaPSHv0 just copy "K2cNqaPSHv0").


Last edited by 78 Camaro on Fri Aug 17, 2012 1:52 pm, edited 1 time in total.

Top
   
 Post subject: Re: '79 project
PostPosted:Sat Aug 18, 2012 7:16 am 
Offline
Big Block
User avatar

Joined:Mon Feb 09, 2009 12:41 pm
Posts:2451
Jeez Ray, you're doing it all again??? That takes some dedication :thumbup: Good luck with it mate, speak to you soon..


Cheers...Nige

_________________
Too much power...not enough hands!!


Top
   
 Post subject: Re: '79 project
PostPosted:Sat Aug 18, 2012 11:30 am 
Offline
Big Block
User avatar

Joined:Tue Feb 23, 2010 12:40 pm
Posts:3245
Car Details:'79 Camaro, 350 V8
Location:South Bucks
Thanks Nige :) just had too many finishes on there, i think the car is a bit lighter now :lol: The rationale was that if i go ahead and do another paint job, and it's sat on a not a very good base, it could come back to haunt me. So i'm taking it back to the factory colour / primer. The passenger door has really messed me up though. If it wasn't for that, it would be in primer in the next few days as i've worked my way round the car now. Just need to do a bit of work to the spoiler as it's wavy. So hot today, don't think i can pick up a sanding block, was sweating like mad yesterday and it's baking already outside!

_________________
How to post pics: When writing a message, scroll down and use the "attach file" option. Where possible, a photo sharing service can be used such as Flickr, Imgur etc. The image location (usually ending in .jpg) can be copy and pasted between the ][ brackets that appear when you click the 'Img' button (you can find this button at the top of the message box).

How to post youtube vids: Click on the 'youtubeHD' button at the top of the message box and in the middle of the ][ brackets that just appeared, copy and paste everything from the youtube web address that appears after the = sign i.e if this is the url: https://www.youtube.com/watch?v=K2cNqaPSHv0 just copy "K2cNqaPSHv0").


Top
   
 Post subject: Re: '79 project
PostPosted:Sat Aug 18, 2012 6:01 pm 
Offline
Big Block
User avatar

Joined:Thu Apr 07, 2011 10:06 pm
Posts:295
Car Details:89 RS V6 Camaro Moggy Traveller with Fiat two litre twincam 35 Standard flying 12 To be Rodded ????
Location:middlesbrough North East
Hi Ray you sure like bodywork, glad the paint company came good ,at long last .Im with you after the problems you have had i think stripping all paint off is the answer, all though it must have been a hard dessision? did you ever invest in a D.A. (They tend to be used on bodywork) you,ll wear yourself out :lol: .Have you stripped all the plod off your door yet ?as a new door skin sounds pricey with deliverey,see iff you can work with what you,v got .The rest of what you,v done looks tops keep up the good work and keep the pics coming :clap: Cheers Neil . P,S. dont drill holes in your doorskin :evil: to pull it out, weld on bits of thin rod and pull out with molegrips (a poormans dent puller)it works and you don,t have holes to weld up and tend not to get so many high spots ,you can also lever off bits of wood ect .


Last edited by neil.w on Sat Aug 18, 2012 9:16 pm, edited 1 time in total.

Top
   
 Post subject: Re: '79 project
PostPosted:Sat Aug 18, 2012 8:22 pm 
Offline
Big Block
User avatar

Joined:Tue Feb 23, 2010 12:40 pm
Posts:3245
Car Details:'79 Camaro, 350 V8
Location:South Bucks
Hey Neil, thanks for the encouragement, much needed right now that's for sure :)
It was no easy decision that's for sure. I contemplated it for quite a while. I did get an air D.A - of course my compressor couldn't keep up :roll:
Annoyingly i bought an electrical polisher before we spoke on the phone end of last year, and it turns out for an extra £20 or so i could have bought an electric d.a :cry: But oh well, live an learn eh! So all hand blocking yes. Got a set of durablocks and the large block does shift some material so it's not going too bad. It's one way to get a beach summer body lol. Lesson learnt for next time! So ye, just working my way up the grit levels with blocks. I did manage to get all the filler off the door with a wire brush on the electric grinder. I managed to get a crowbar behind the big dents and flatten the major parts out Great tip on the welder!! I will do that for sure. I was gonna use my slide hammer, but with a few ground down bolts as pins and weld those and use them as pullers. I think your method will be better though. There were a few holes where they drilled the old fashion dent puller :( but luckily they havent rusted so just need to plug them up. Cheers for the tips, would like to get started on the door tomorrow if i can finish the last parts of the spoiler. thanks!!

_________________
How to post pics: When writing a message, scroll down and use the "attach file" option. Where possible, a photo sharing service can be used such as Flickr, Imgur etc. The image location (usually ending in .jpg) can be copy and pasted between the ][ brackets that appear when you click the 'Img' button (you can find this button at the top of the message box).

How to post youtube vids: Click on the 'youtubeHD' button at the top of the message box and in the middle of the ][ brackets that just appeared, copy and paste everything from the youtube web address that appears after the = sign i.e if this is the url: https://www.youtube.com/watch?v=K2cNqaPSHv0 just copy "K2cNqaPSHv0").


Top
   
 Post subject: Re: '79 project
PostPosted:Sun Aug 19, 2012 2:20 pm 
Offline
Big Block
User avatar

Joined:Mon Feb 09, 2009 12:41 pm
Posts:2451
Are you likely to be around this way again?? if so, you can drop the door off with me if you don't feel like doing it & I'll sort it out for you hth

cheers...Nige

_________________
Too much power...not enough hands!!


Top
   
 Post subject: Re: '79 project
PostPosted:Thu Aug 23, 2012 12:41 pm 
Offline
Big Block
User avatar

Joined:Tue Feb 23, 2010 12:40 pm
Posts:3245
Car Details:'79 Camaro, 350 V8
Location:South Bucks
Hey Nige,

That's an extremely kind offer thank you! I'm about to start on the door later this afternoon, bit of work on the spoiler to finish up first. I'll be trying it out today and tomorrow then see how it works out. If it doesn't work out so well, then i'll be making a £5.75 donation to the severn bridge fund soon to come say hi :)

Cheers!

Ray

_________________
How to post pics: When writing a message, scroll down and use the "attach file" option. Where possible, a photo sharing service can be used such as Flickr, Imgur etc. The image location (usually ending in .jpg) can be copy and pasted between the ][ brackets that appear when you click the 'Img' button (you can find this button at the top of the message box).

How to post youtube vids: Click on the 'youtubeHD' button at the top of the message box and in the middle of the ][ brackets that just appeared, copy and paste everything from the youtube web address that appears after the = sign i.e if this is the url: https://www.youtube.com/watch?v=K2cNqaPSHv0 just copy "K2cNqaPSHv0").


Top
   
 Post subject: Re: '79 project
PostPosted:Sun Aug 26, 2012 9:18 pm 
Offline
Big Block
User avatar

Joined:Tue Feb 23, 2010 12:40 pm
Posts:3245
Car Details:'79 Camaro, 350 V8
Location:South Bucks
Ok so a quick update on the door. Have been hammering away (literally) over the weekend and it's starting to take shape.

Below are some pics of before, as i don't have any afters yet seeing as it's not done. There were 3 big dents, 2 were nearly 10 inches in diameter and located in the front 2/3rds of the door, the 3rd about 6 inches, about where the door handle is. All the damage is at and below the body line. There were 2 creases running about the 1/3 of the length of the door in the middle of which was a nice long flat spot, so the door had no bow / curve at this point. The deepest part of the body filler on the panel was 9mm.

I've managed to get the dents mostly out, with the deepest indents on the panel now only being 2mm. I had oil canning between the 2 big dents, which was roughly under where the line of the mirror is. I had to make a relief cut in the metal as it was just popping in or or out, instead of shrinking back into place. I used a couple of crowbars to pry out the majority of the metal back into rough shape, using the inner big steel bar as a lever. The steel bar is good and bad, with the bad part being that you can't get a dolly behind that part of the metal. I made a makeshift studwelder/dent puller seeing as they cost £400+ :( I used my slide hammer, found a bolt that had a thread that fit into the slide hammer end, welded a bit of steel rod to the bolt head, voila. Used mig welder to tack weld tip of steel rod to panel. It's not as quick or easy, but for a one off job, works pretty well. I also made a cardboard template of the profile of the door from the drivers side, so i could place it against the passenger side to see where within the curve there were high and low spots. Using this and the steel bar, i was able to get an X and Y view of where the shape of the door should be.

The door has it's curve / bow back, but when you place a long bar along the door, there you can see the 2mm indent of the old 2 big dents. I will be happy if the lowest parts maximums are 1mm. As i'm no metal worker and this is my first time really doing this kind of work, i knew it wouldn't be perfect, and i knew i would have to accept a slight wave and hammer marks. If i can get it down to this point of 1mm tolerance, i will be happy with a skim layer of filler at it should only be 1mm thick in the worst of places. Upol liquid gold stopper recommends a max depth of 3mm, so even if i end up with 1.5mm i would be ok with that.

I have learned a lot of respect for metal workers! Sounds easier than it is :thumbup:

So back on it tomorrow, hopefully only 1 more day to level out the remainder of the 2 big dents and flat out as much of the hammer marks as possible. Need to make a couple of patch panels, so maybe 2 more full days for the metal, then the time to fill and sand it smooth.

Image

Image

_________________
How to post pics: When writing a message, scroll down and use the "attach file" option. Where possible, a photo sharing service can be used such as Flickr, Imgur etc. The image location (usually ending in .jpg) can be copy and pasted between the ][ brackets that appear when you click the 'Img' button (you can find this button at the top of the message box).

How to post youtube vids: Click on the 'youtubeHD' button at the top of the message box and in the middle of the ][ brackets that just appeared, copy and paste everything from the youtube web address that appears after the = sign i.e if this is the url: https://www.youtube.com/watch?v=K2cNqaPSHv0 just copy "K2cNqaPSHv0").


Top
   
Display posts from previous: Sort by 
Post new topic Reply to topic  [456 posts ]  Go to pagePrevious167891046Next

All times are UTC


Who is online

Users browsing this forum: No registered users and 26 guests


You cannot post new topics in this forum
You cannot reply to topics in this forum
You cannot edit your posts in this forum
You cannot delete your posts in this forum
You cannot post attachments in this forum

Search for:
Jump to:  
cron
Powered by phpBB® Forum Software © phpBB Limited