The Camaro Club (UK)

Online Community for all Camaro Owners and enthusiasts
It is currently Mon Nov 25, 2024 6:00 am

All times are UTC


Post new topic Reply to topic  [49 posts ]  Go to pagePrevious12345Next
Author Message
PostPosted:Fri Nov 27, 2015 2:19 pm 
Offline
Big Block
User avatar

Joined:Tue Feb 23, 2010 12:40 pm
Posts:3245
Car Details:'79 Camaro, 350 V8
Location:South Bucks
If you apply wet on wet, or within it's re-coat timeframe, then there will be a chemical adhesion and you don't need to key it. If say, you sprayed it black on Monday morning, waited until Tuesday afternoon for clearcoat, then you would need to sand it so that there's a key. If you sprayed it in black on Monday morning and within half an hour to an hour clear coated it, then you would have chemical adhesion so no need to sand. As Jamieg285 mentions, the clear fills in the valleys of the sanding and create a smooth layer on top, so you end up with a smooth finish. You can see this effect when you wet sand something - dry off a sanded surface and it looks matt - wipe a wet cloth across and it looks like it's been cleared, as the water has filled in the scratches leaving a smooth finish, then once it evaporates it goes back to matt. Turned out very well indeed, good job!!

_________________
How to post pics: When writing a message, scroll down and use the "attach file" option. Where possible, a photo sharing service can be used such as Flickr, Imgur etc. The image location (usually ending in .jpg) can be copy and pasted between the ][ brackets that appear when you click the 'Img' button (you can find this button at the top of the message box).

How to post youtube vids: Click on the 'youtubeHD' button at the top of the message box and in the middle of the ][ brackets that just appeared, copy and paste everything from the youtube web address that appears after the = sign i.e if this is the url: https://www.youtube.com/watch?v=K2cNqaPSHv0 just copy "K2cNqaPSHv0").


Top
   

Re: Exterior restoration/modifications.

Sponsor

Sponsor
 

PostPosted:Fri Nov 27, 2015 9:54 pm 
Offline
Big Block

Joined:Tue Oct 28, 2014 8:45 am
Posts:287
Car Details:1981 Camaro Z28
Location:Essex
Quote:
If you apply wet on wet, or within it's re-coat timeframe, then there will be a chemical adhesion and you don't need to key it. If say, you sprayed it black on Monday morning, waited until Tuesday afternoon for clearcoat, then you would need to sand it so that there's a key. If you sprayed it in black on Monday morning and within half an hour to an hour clear coated it, then you would have chemical adhesion so no need to sand. As Jamieg285 mentions, the clear fills in the valleys of the sanding and create a smooth layer on top, so you end up with a smooth finish. You can see this effect when you wet sand something - dry off a sanded surface and it looks matt - wipe a wet cloth across and it looks like it's been cleared, as the water has filled in the scratches leaving a smooth finish, then once it evaporates it goes back to matt. Turned out very well indeed, good job!!
I did actually find that heavy coats of the paint looked pretty good, when all the paint laid properly. It was difficult with an aerosol though, a bit hit and miss. With the above information I could've got straight on to the lacquer within the required time, and made that chemical bond. Never mind, armed with the above information I think I'll take the leap of faith and wet sand, then lacquer. Many thanks :)


Top
   
PostPosted:Fri Nov 27, 2015 9:57 pm 
Offline
Big Block

Joined:Tue Oct 28, 2014 8:45 am
Posts:287
Car Details:1981 Camaro Z28
Location:Essex
Quote:
Quote:
Quote:
Beautiful finish but, I think you are meant to key the black, lacquer it and then polish - as it is the lacquer will have trouble sticking to such a high polished finish. Not trying to be clever but hopefully useful for future ref.
I have heard this. My dilemma is this, if I key the surface via wet sanding of 1500, 2500 or 3000 paper the surface will become dull and scratched. Surely the dull surface will show through the lacquer??
You would think so, and I thought it was odd the first time I saw it. The shine comes from the smooth top surface, anything below will just be colour showing through the top layer, which you can make nice and thick with multiple layers, so you can smooth it down nicely for a top shine.
Many thanks for the info there :)

I'll go with that, question is what paper should I be using to wet sand the paint before applying the lacquer? Obviously is too much abrasion the lacquer won't help, but too little and as you say adhesion will be poor. Perhaps 1500, or maybe 2500?? I've all the grades of paper available to me.


Top
   
PostPosted:Sat Nov 28, 2015 11:57 am 
Offline
Big Block
User avatar

Joined:Tue Feb 23, 2010 12:40 pm
Posts:3245
Car Details:'79 Camaro, 350 V8
Location:South Bucks
Quote:
I'll go with that, question is what paper should I be using to wet sand the paint before applying the lacquer? Obviously is too much abrasion the lacquer won't help, but too little and as you say adhesion will be poor. Perhaps 1500, or maybe 2500?? I've all the grades of paper available to me.
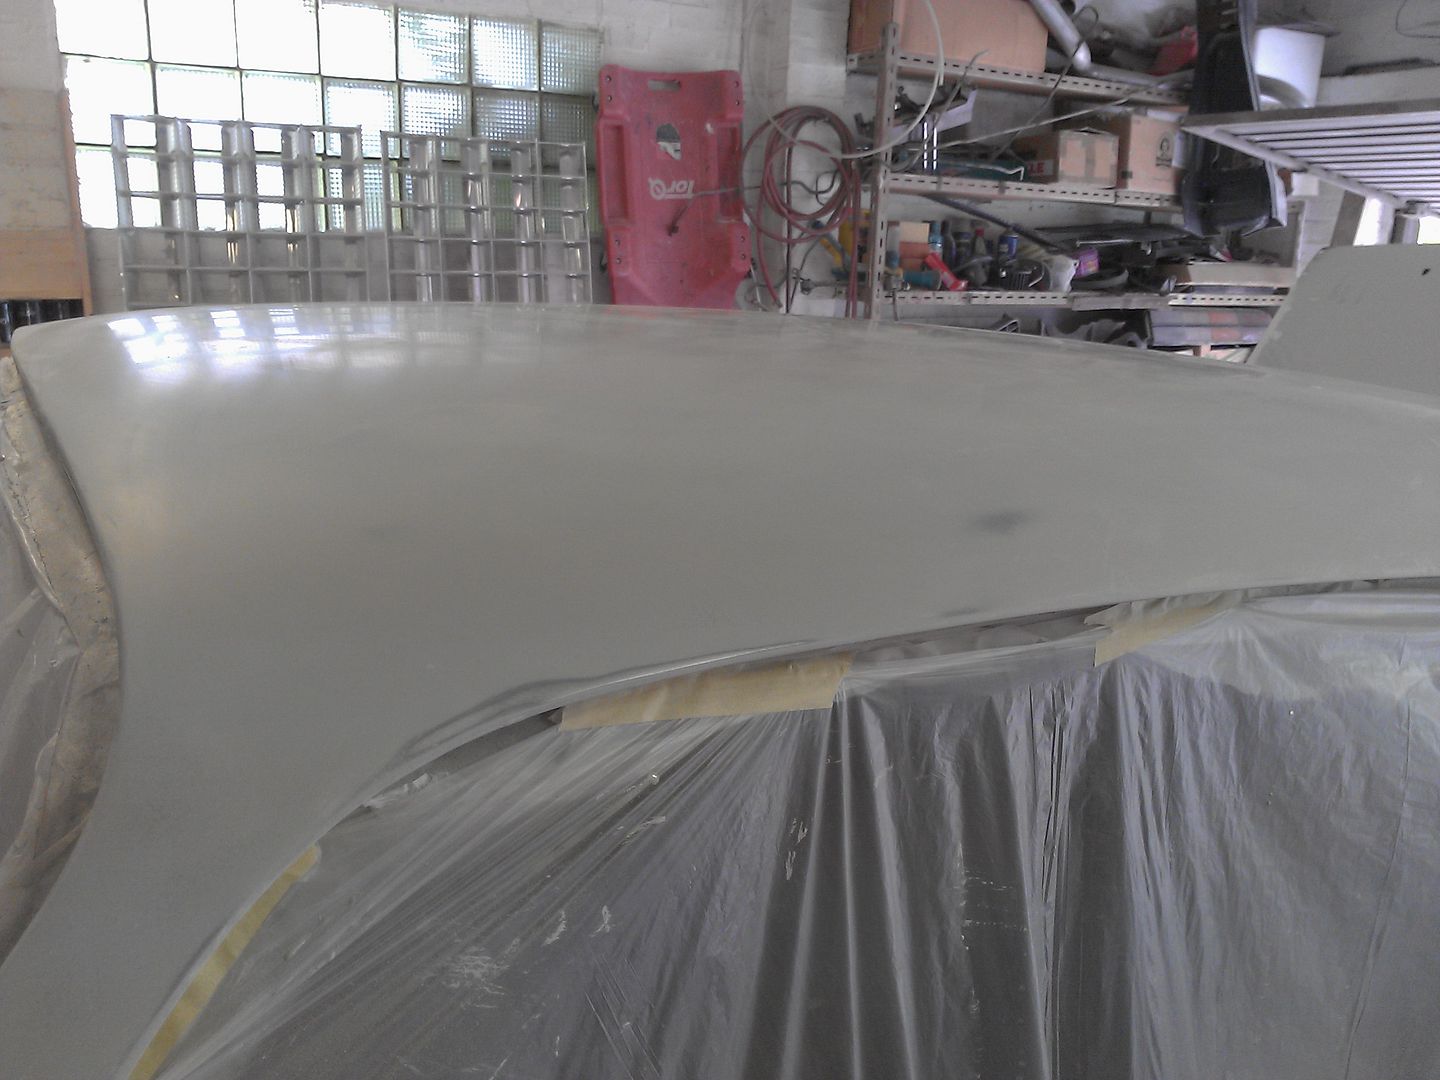
800 is a good grit, as it's fine enough to be a smooth flat surface but leaves enough of a key for grip. 1500 will be a bit too fine - when people do repairs on a panel, or sand primer for topcoat, it's sanded 600 - 800 for the area that paint will be applied to and the edge (when doing a repair, where paint lands indirectly) is sanded to 1000. 600 is when you start to see a sheen, here's a pic of the reflection of 600 on the primer. This was then topcoated with colour:
Image

To put things into a little bit more perspective - if you're doing a flat paint (non metallic) then you would sand the primer with 600, lay the base down and then the clear. If you're doing metallic, then you would sand the primer with 800 , as 600 has slightly deeper valleys that allow the metallic to fall into and sit at uneven angles, so you would use an 800 grit so that the metallic flakes can't fall into the gaps, meaning they sit nice and uniformly.

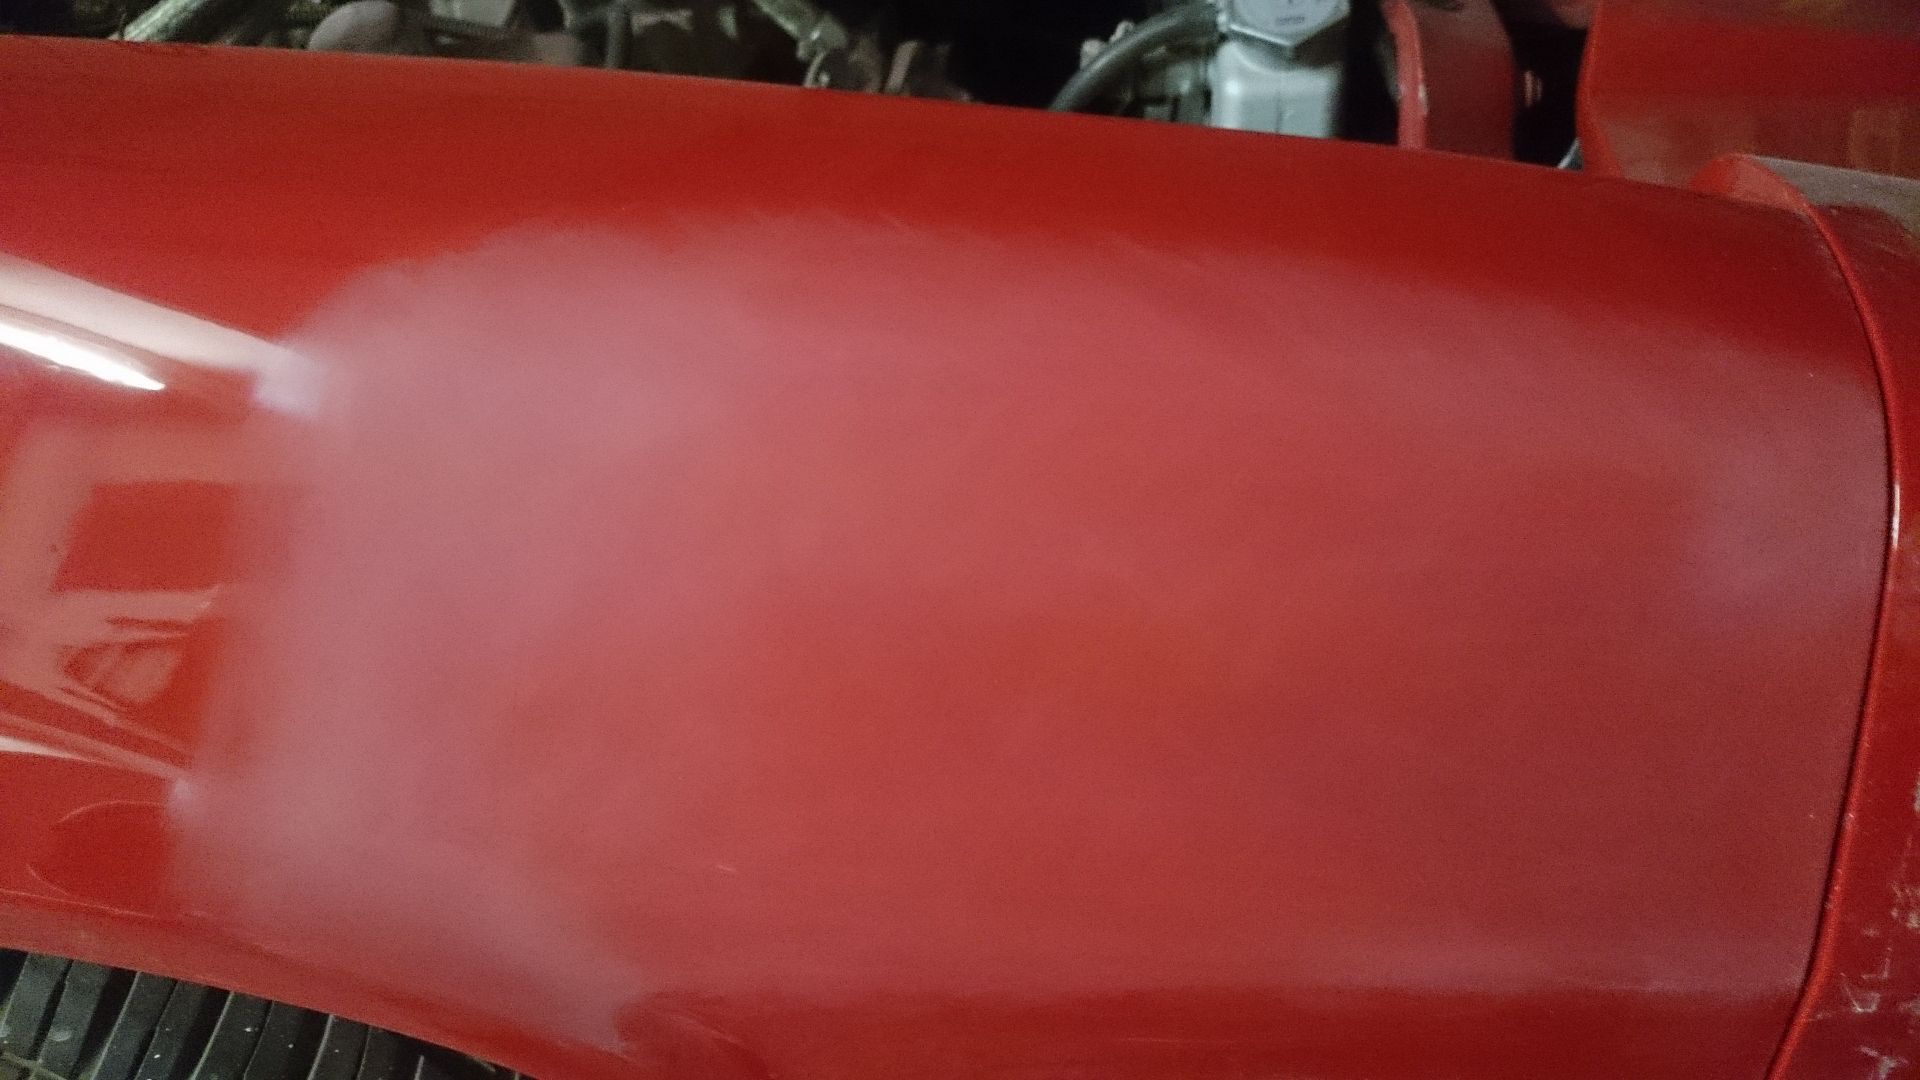
Here's a repair i did. I had some runs in the paint and some discolouration, so i sanded the clear down with 800, even though it's non metallic (i had a lot of 800). Then the edge is done with 1000, you should be able to see a hazey outline where 1000 is used. This is to feather the paint out so you don't get a hard paint edge - i rolled masking tape over to get a soft tape edge, this way the paint hits indirectly vs. being directly sprayed on. I then sprayed with 2k single stage, then 2k clear, after about 30 minutes of the colour going on. Then next pic is after paint, you can see the 1000 outline still with some overspray on it. The whole thing will be sanded with 1500, then 2500, maybe 3000 / 4000, somewhere around there, then cut and polished.
Image

After paint:

Image

_________________
How to post pics: When writing a message, scroll down and use the "attach file" option. Where possible, a photo sharing service can be used such as Flickr, Imgur etc. The image location (usually ending in .jpg) can be copy and pasted between the ][ brackets that appear when you click the 'Img' button (you can find this button at the top of the message box).

How to post youtube vids: Click on the 'youtubeHD' button at the top of the message box and in the middle of the ][ brackets that just appeared, copy and paste everything from the youtube web address that appears after the = sign i.e if this is the url: https://www.youtube.com/watch?v=K2cNqaPSHv0 just copy "K2cNqaPSHv0").


Top
   
PostPosted:Mon Nov 30, 2015 10:37 pm 
Offline
Big Block

Joined:Tue Oct 28, 2014 8:45 am
Posts:287
Car Details:1981 Camaro Z28
Location:Essex
You mention that you used 2K single stage, I'm simply using aerosol which I'm guessing quite different? Thanks for sharing an elaborate wealth of information on how to achieve a good result. I went with 1200 grit today, as an experiment. I was a little concerned the 800 might be a little too rough for the aerosol lacquer.

Obviously the wing mirror I worked on was dull and flat after wet sanding, but pleasingly after taking the leap of faith from the information on here :) It's worked out rather well...

Image

Ok, I did go a little heavy with the application but it dried like that :)


Top
   
PostPosted:Wed Dec 02, 2015 9:55 pm 
Offline
Big Block

Joined:Tue Oct 28, 2014 8:45 am
Posts:287
Car Details:1981 Camaro Z28
Location:Essex
Once the wing mirror had cured over the past 48 hours I began wet sanding. Started with 1200 grit, looking back it would've been better at 800, took quite a while to persuade the orange peel to leave ;) There on it was 2500 grit then 4000. Finally using these two products, pleasingly which can be applied by hand and do give a very good results :)

Image


Top
   
PostPosted:Wed Dec 02, 2015 9:58 pm 
Offline
Big Block

Joined:Tue Oct 28, 2014 8:45 am
Posts:287
Car Details:1981 Camaro Z28
Location:Essex
...and the result speaks for itself :clap: :D

Image

Not bad if I don't say so myself :dance:


Top
   
PostPosted:Wed Dec 02, 2015 10:01 pm 
Offline
Big Block

Joined:Tue Oct 28, 2014 8:45 am
Posts:287
Car Details:1981 Camaro Z28
Location:Essex
So, it's on to the rest of the exterior trim. Flatted these the other day, just gotta wet sand with 2500 then 4000, compound and polish.

Image

Image


Top
   
PostPosted:Mon Dec 14, 2015 10:59 pm 
Offline
Big Block

Joined:Tue Oct 28, 2014 8:45 am
Posts:287
Car Details:1981 Camaro Z28
Location:Essex
Image

Began wet sanding the front spoiler parts due to cracks in the urethane. Thankfully nothing serious, I suspect they've appeared due age rather than force and stress.

Image

The Z28's original silver can be seen in the paint layers, sanded all the way back to urethane to avoid nasty cracks reappearing.


Top
   
PostPosted:Thu Dec 17, 2015 6:33 pm 
Offline
Big Block

Joined:Tue Oct 28, 2014 8:45 am
Posts:287
Car Details:1981 Camaro Z28
Location:Essex
Plastic primer is applied, the parts are wet sanded to reveal high and low spots.

Image

Image

More plastic primer was applied, the above process repeated until the surface had no low or high spots.


Top
   
Display posts from previous: Sort by 
Post new topic Reply to topic  [49 posts ]  Go to pagePrevious12345Next

All times are UTC


Who is online

Users browsing this forum: No registered users and 6 guests


You cannot post new topics in this forum
You cannot reply to topics in this forum
You cannot edit your posts in this forum
You cannot delete your posts in this forum
You cannot post attachments in this forum

Search for:
Jump to:  
cron
Powered by phpBB® Forum Software © phpBB Limited