The Camaro Club (UK)

Online Community for all Camaro Owners and enthusiasts
It is currently Fri Nov 22, 2024 4:08 am

All times are UTC


Post new topic Reply to topic  [57 posts ]  Go to page123456Next
Author Message
 Post subject: Jamieg285's '79 rebuild
PostPosted:Fri Aug 07, 2015 1:46 pm 
Offline
Big Block

Joined:Mon Mar 09, 2009 12:13 pm
Posts:205
Car Details:1979 Camaro
Hi everyone,

Some of you may be aware of the full build project thread I've got going on NastyZ28, but I thought that there would be some interest in my 'small' project I've got going on right now. It will also be useful to get some input from the Camaro experts on this side of the pond. I won't go into all the detail here, but put up the main highlights and progress as I go.

I've had my '79 for just over 11 years now. In that time I've done plenty to it to make it mine and to improve it. I've not really documented much of this in the past, but during the course of the overall project I'll be going over the entire car, so will be able to summarise as I go. I'm on a very tight budget, so I can't go to town and buy all the bits I wanted and have to make do in some cases. I've amassed a small collection of bits and pieces over the year, but generally not had the avaialble time to fit them, so many of these will pop up as I go through the rebuild.

If you're interested, you can read the full detail at http://www.nastyz28.com/forum/showthread.php?t=276333


Last edited by Jamieg285 on Tue Mar 15, 2016 12:43 pm, edited 1 time in total.

Top
   

Jamieg285's '79 rebuild

Sponsor

Sponsor
 

PostPosted:Fri Aug 07, 2015 1:46 pm 
Offline
Big Block

Joined:Mon Mar 09, 2009 12:13 pm
Posts:205
Car Details:1979 Camaro
The project started in earnest in Feb 2014 when it failed it's MOT. Instead of the minor issues I'd had to deal with in this past, this time it was major, with 'excessive' corrosion listed in various places, the main ones being the front leaf spring mount area (both sides) and outer rocker.

Image

Image


I think most people would have given up on the car at this point, but it's special to me as it was bought for my 30th birthday. There's nothing special about the car itself, it's not even a z28, but I didn't want it to go, particulalry as I doubted that I would get a replacement. At this stage, I didn't think it would take too much work to sort out and had ambitions of it being back on the road within 6 months. How wrong could I be? Read on to find out...


Top
   
PostPosted:Fri Aug 07, 2015 1:48 pm 
Offline
Big Block

Joined:Mon Mar 09, 2009 12:13 pm
Posts:205
Car Details:1979 Camaro
First step was to start pulling things apart to work out a shopping list of parts. I already knew I wanted the passenger outer and inner rockers, but what else would I need? The plan was to get all of the stuff I needed at once and use STS Imports to bring it all in.

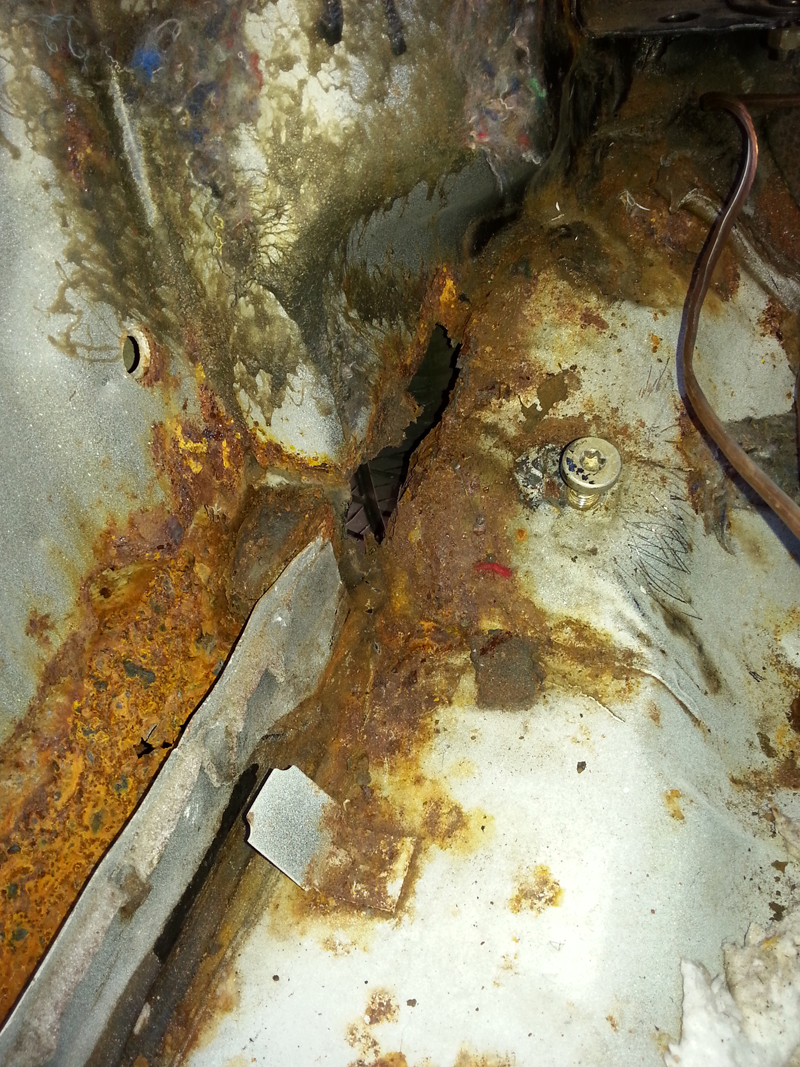
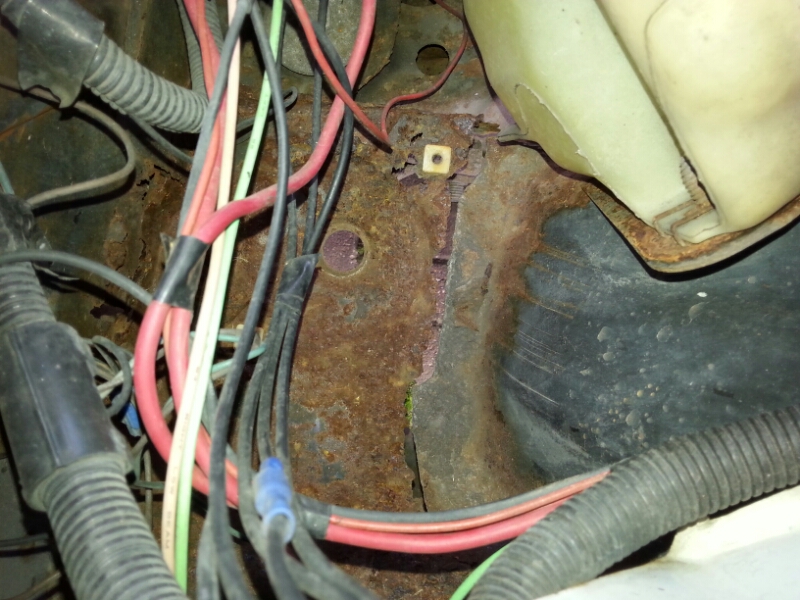
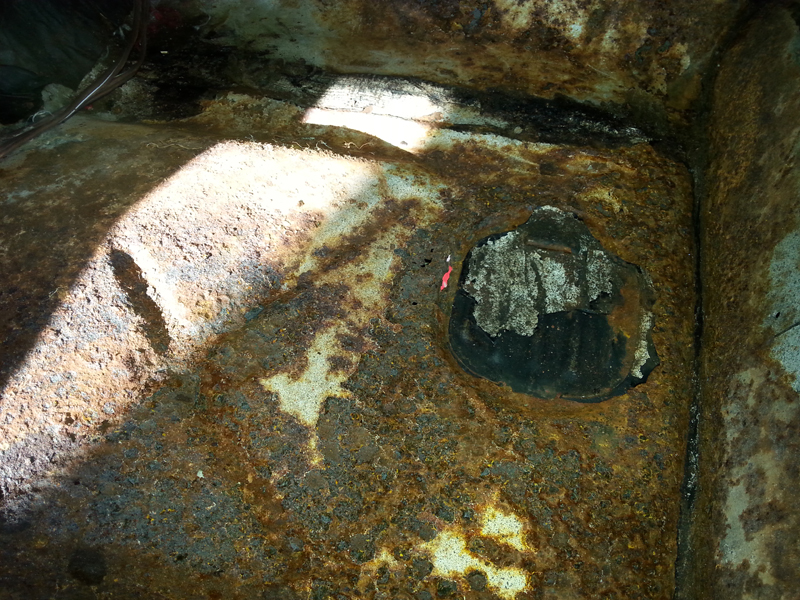
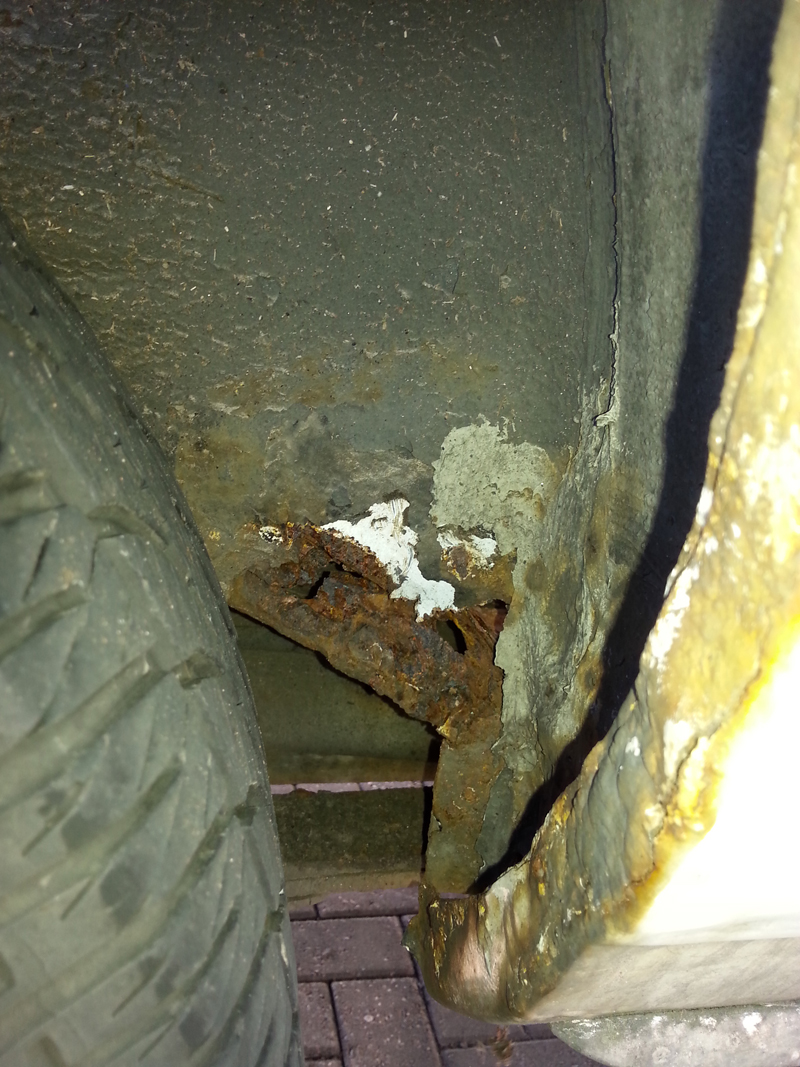
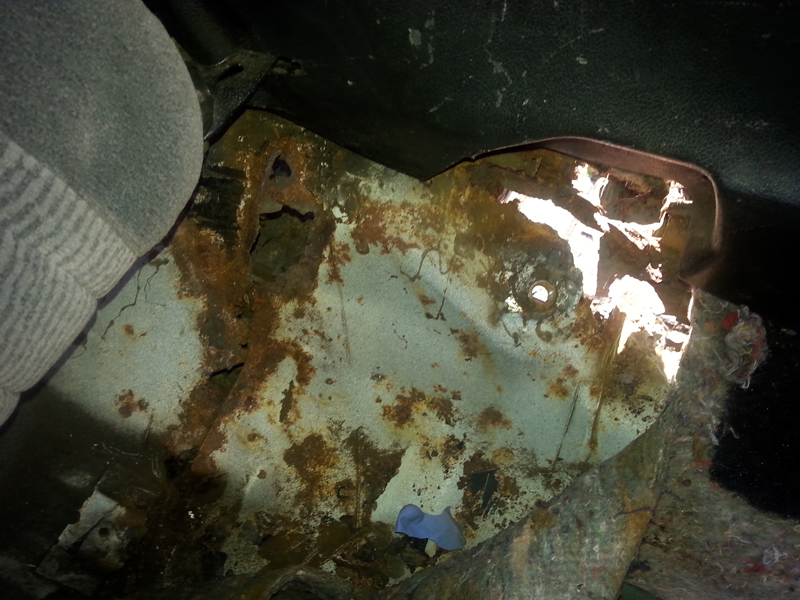
A quick strip down of the interior unearthed problems with the front and rear section of the passenger floor pan and the rear inner wheel house.
Image

Image
(Yes - that's the rear tyre in the middle)
Image

Drivers side rockers looked OK, and the front floor pan had been repaired a few years ago. The rear floor pan and inner wheelhouse were a different matter though, looking worse than the passenger one.
Image

I didn't have the budget for the full lenght floor pan for both sides, so only added the inner wheel house to the list.

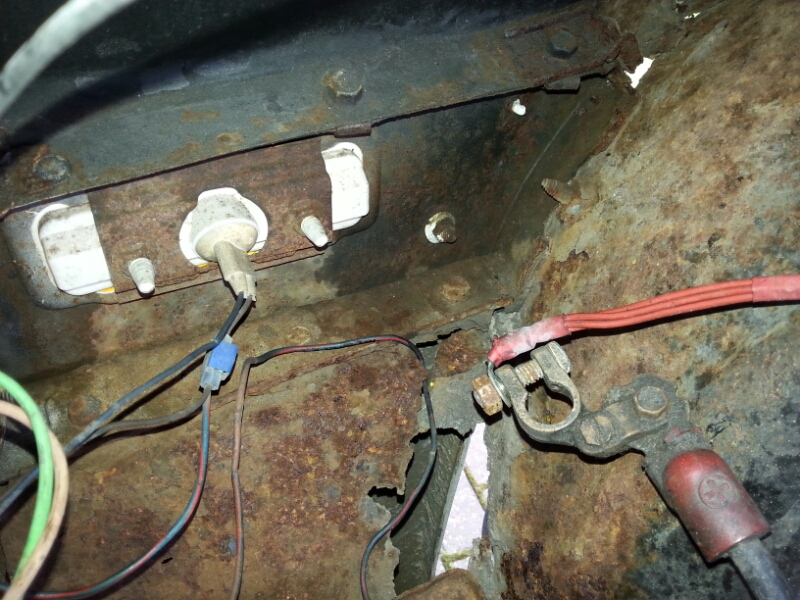
The front inner fenders weren't looking particulalry good either, so a pair of these were added.
Image

Image

A few other odds and ends were also ordered, more on those later when the time comes to fit them.


Top
   
PostPosted:Fri Aug 07, 2015 1:48 pm 
Offline
Big Block

Joined:Mon Mar 09, 2009 12:13 pm
Posts:205
Car Details:1979 Camaro
With the parts ordered, but an 8 week wait for them to arrive, I set about stripping the car down. Nose and front metal work were removed. The nose could do with replacing as it's cracked, but it should still be useable. Fender extensions are toast, but I managed to score a pair of NOS for a steal a couple of years ago. The fenders themselves have seen better days and need replacing or repairing, but again could be re-used as is.
Image

Although there was nothing particularly wrong with the sub-frame, I intended to remove it as I had a ready restored one (99p eBay bargain) to swap into it's place, so all of the suspension and front brake system was also pulled off at this point.

To get the torque boxes out, I needed to remove the leaf springs (which needed the fuel tank out. The drivers spring fell apart, but should be repairable.
Image

Unfortunately, removing the springs revealed more damage. The front spring hangers are severly rusted and need replacing (got a decent pair ready to go), but worse than that is a fist sized hole in the frame rail.
Image


Top
   
PostPosted:Fri Aug 07, 2015 1:49 pm 
Offline
Big Block

Joined:Mon Mar 09, 2009 12:13 pm
Posts:205
Car Details:1979 Camaro
With so much to do on the car, I have the luxury(?) of being able to chop and change between diffrent sub-tasks. More strip down work saw the sub-frame dropped and a lot of the interior removed.
Image

I've got a custom guage setup, mounted in the original bezel. This has proved a bit weak and has cracked over time, so I started to try and re-inforce it.
Image

I'd planned to attach some perforated steel sheet behind it, and spent a number of hours working on it, however it all went wrong and I have managed to wreck the bezel and will have to start again. Thankfully, I have a spare bezel to work with.

Removal of the steering column revealed a lot of damage to the mounting plate, but suprsingly none in the surrounding area on the firewall.
Image

I spotted a couple of areas in the cowl that have been letting water into the cabin, and these will need sorting.


Top
   
PostPosted:Fri Aug 07, 2015 1:49 pm 
Offline
Big Block

Joined:Mon Mar 09, 2009 12:13 pm
Posts:205
Car Details:1979 Camaro
With the shippmet of parts collected, I was now able to start attacking the rockers, using the new panels as reference to know what to remove. Using a combination of spot weld cutter and chisel, I slowly removed the outer.
Image

Image

It proved tricky at the rear end, as most of the surronding metal was missing, so hard to visualise how it should fit back together.
Image

Getting to the front spot welds required removal of the door - I did my best not to chip the paint, but failed. I have since made the decision to replace the doors anyway (yes, there's a spare pair of those too)
Image

Eventually, it was out.
Image


Top
   
PostPosted:Fri Aug 07, 2015 1:50 pm 
Offline
Big Block

Joined:Mon Mar 09, 2009 12:13 pm
Posts:205
Car Details:1979 Camaro
The inner and mating faces of the outer rocker were painted with some epoxy primer (brushed - don't have the luxury of a compressor), and held in place with screws.
Image

There's a lot of different panel interaction at the rear of the rocker, so I wanted to get some of the others loosely sorted before welding it in, so the first job was to start cutting out the bad bits in the inner wheelhouse.
Image

Image

The outerwheel house also needed some work, but I had to make the replacement for this.
Image

Image


The inner support structure was toast, so I had to make up a new piece for this too.
Image

Not bad for two hammers and a vice!
Image

Image


With all those bits carefully lined up the outer rocker was finally welded into place, on the ends at least. The inner rocker was going to come out next.
Image


Top
   
PostPosted:Fri Aug 07, 2015 1:51 pm 
Offline
Big Block

Joined:Mon Mar 09, 2009 12:13 pm
Posts:205
Car Details:1979 Camaro
The next major section of work was the passenger torque box, inner rocker and floor pans, as all inter-related to each other.
Image

Lots of spot welds attaching the floor to the old torgue box to be drilled out.
Image

Once that was separated, the floor was cut a bit further to get rid of some patches of rust, then I was able to trial fit the new box.
Image

Image


Next up was the removal of the inner rocker, here being cut out in sections.
Image

And then sections of floor pan and toe board.
Image

Image

Then a trial fit of the new inner, next to the box.
Image


Top
   
PostPosted:Fri Aug 07, 2015 1:52 pm 
Offline
Big Block

Joined:Mon Mar 09, 2009 12:13 pm
Posts:205
Car Details:1979 Camaro
I knew when I bought it that the full length floor pan wouldn't be a direct fit (70-77 into a 79), so a trial fit was required to see what the differences are. Quite a bit as it happens.
Image

Sections were cut from the full panel to give me front and rear sections to match my holes.
Image

Image

The lower corner of the seatback panel was in poor condition, so this needed replacing too.
Image

All the rear parts were then drilled ready for welding in.
Image

The front section of the floor was also trimmed to fit.
Image

The mismatch on floor profiles didn't turn out to be as bad as first thought, and I worked around it with a small patch on the rear corner to handle the transition.
Image

Everything was then primered and prep'ed and the welding began.
Image

Image

Image

Image

Image

Image

Image


No-one said it had to be pretty. That's what the grinder is for!


Top
   
PostPosted:Fri Aug 07, 2015 1:54 pm 
Offline
Big Block

Joined:Mon Mar 09, 2009 12:13 pm
Posts:205
Car Details:1979 Camaro
Next job on the list is the tail panel and the first job was to strip the rear end away and inspect. It wasn't pretty.
Image

It didn't get any better as I dug deeper.
Image

I'd already got the lower tail light patch panel and was planning to use that and make up the difference, but I have subsequently decided to replace the whole panel. The crossrail panel that sits behind it was out of budget range, so I set about repairing this in patches, far easier than trying to do it in one piece.
Image

Image

It's only tacked in place for now and will be removed and tidied up later.
Image


Top
   
Display posts from previous: Sort by 
Post new topic Reply to topic  [57 posts ]  Go to page123456Next

All times are UTC


Who is online

Users browsing this forum: No registered users and 2 guests


You cannot post new topics in this forum
You cannot reply to topics in this forum
You cannot edit your posts in this forum
You cannot delete your posts in this forum
You cannot post attachments in this forum

Search for:
Jump to:  
cron
Powered by phpBB® Forum Software © phpBB Limited