The Camaro Club (UK)

Online Community for all Camaro Owners and enthusiasts
It is currently Mon Nov 25, 2024 4:05 am

All times are UTC


Post new topic Reply to topic  [57 posts ]  Go to pagePrevious123456
Author Message
PostPosted:Wed Jan 02, 2019 1:31 pm 
Offline
Big Block

Joined:Mon Mar 09, 2009 12:13 pm
Posts:205
Car Details:1979 Camaro
Not made much more progress of late. When the weather turned I switched to some in-garage work - stripping the upper a-arms ready to fit new bushes. Only part way through that too. I need to get some pictures and update the thread.

The car was actually in pretty good condition when I got it, and was in daily use for 10 years. It seems such a long time ago now, and even longer before it will be back. I doubt it will be 2019, and even 2020 will be a stretch, unless I can get a lot more time to invest in it this year and next.


Top
   

Re: Jamieg285's '79 rebuild

Sponsor

Sponsor
 

PostPosted:Fri Jan 18, 2019 7:42 pm 
Offline
Big Block
User avatar

Joined:Tue Feb 23, 2010 12:40 pm
Posts:3245
Car Details:'79 Camaro, 350 V8
Location:South Bucks
What i found with my resto was that it seems that you grind away and the end seems to get further and further away... but then all of a sudden it starts to go together and very quickly resembles the car it's meant to be. Sounds like you're not far from that turning point. Is there much left on the body work?

_________________
How to post pics: When writing a message, scroll down and use the "attach file" option. Where possible, a photo sharing service can be used such as Flickr, Imgur etc. The image location (usually ending in .jpg) can be copy and pasted between the ][ brackets that appear when you click the 'Img' button (you can find this button at the top of the message box).

How to post youtube vids: Click on the 'youtubeHD' button at the top of the message box and in the middle of the ][ brackets that just appeared, copy and paste everything from the youtube web address that appears after the = sign i.e if this is the url: https://www.youtube.com/watch?v=K2cNqaPSHv0 just copy "K2cNqaPSHv0").


Top
   
PostPosted:Fri Jan 18, 2019 7:49 pm 
Offline
Big Block

Joined:Mon Mar 09, 2009 12:13 pm
Posts:205
Car Details:1979 Camaro
It feels like I've hardly started when I look at what's left. Got to finish the tail panel, passenger side drop off and wheel house, rear quarters on both sides. The to the front, removing screen and replacing the cowl panel and dealing with and damage found underneath. Then there will be tidying up the fenders and nose.


Top
   
PostPosted:Mon Mar 04, 2019 6:09 pm 
Offline
Big Block
User avatar

Joined:Tue Feb 23, 2010 12:40 pm
Posts:3245
Car Details:'79 Camaro, 350 V8
Location:South Bucks
It does feel that way for sure, but there's only less and less work to do each time you're out there. Half of the work is cutting out the bad stuff and figuring out what to do! Once the replacement panels are there - it suddenly becomes a done piece that you can forget about for good. I've often forgotten the things done to the Camaro, looking back over all pics I realise how much was actually fixed!
What's got to be done on the front / underneath? New floor pans?

_________________
How to post pics: When writing a message, scroll down and use the "attach file" option. Where possible, a photo sharing service can be used such as Flickr, Imgur etc. The image location (usually ending in .jpg) can be copy and pasted between the ][ brackets that appear when you click the 'Img' button (you can find this button at the top of the message box).

How to post youtube vids: Click on the 'youtubeHD' button at the top of the message box and in the middle of the ][ brackets that just appeared, copy and paste everything from the youtube web address that appears after the = sign i.e if this is the url: https://www.youtube.com/watch?v=K2cNqaPSHv0 just copy "K2cNqaPSHv0").


Top
   
PostPosted:Wed Mar 06, 2019 1:07 pm 
Offline
Big Block

Joined:Mon Mar 09, 2009 12:13 pm
Posts:205
Car Details:1979 Camaro
Most of the floor pans are done now. I need to sort out where the parking brake goes through it, and I want to tidy up an earlier repair made to the drivers footwell.
The main work is the cowl panel and whatever is hiding under it.

Forward of that, the fenders are solid, just need cleaning up a bit, but not expecting any welding. I have NOS fender extensions and some decent originals, so will have to decide which to use. Core support is already sorted and powder coated, and new inner fenders, so again, not expecting any welding.

I'm currently working on cleaning up the a-arms, ready to be painted and fitted with Del-alum bushes. Seems an age since I worked on the car itself, so may alternate on jobs for a bit.


Top
   
PostPosted:Fri Apr 26, 2019 5:03 pm 
Offline
Big Block

Joined:Mon Mar 09, 2009 12:13 pm
Posts:205
Car Details:1979 Camaro
Spring is finally here, the weather has improved and it's time to get out on the car again.

As with most years, I've had a bit of a winter project going where the jobs can be done inside the garage (which seems to be ever shrinking as I gather more parts). This year there was someone in the UK that was looking for some stock a-arm cross shafts. Knowing that I was going to be replacing mine with offset ones, it seemed like a good time to look at replacing the bushes and shafts.

Sadly I didn't take any progress pics, but in order to get the bushes out I bought a cheap ball joint press and cut a slot in the receiving end of it, so it would slot over the center shaft. Getting the bushes out was hard work with the manual press, but all-in-all, easier than I was expecting.
Oddly, the front bushes on both sides had problems with the rubber separating from the inner sleeve, with the latter having to be carefully cut and chiselled off.

With the bushes out I attacked them with a wire brush in a drill and cleaned them up. They've now been coated in epoxy and I'll look at fitting the del-alums and new cross-shafts next time it rains and I can't work outside. I think I'll need to fab up some small support brackets to help push them in.
Image


Back to the car itself, work continued with the repairs to the trunk floor. I can't find the progress pics for this, so will have to make do with the current state, where the floor has been welded up, cleaned and trunk/tail support piece welded in.
Image

With that corner now done it's time to start on the passenger side. I don't want to weld the tail panel in until both trunk drop-offs are done. As with the other side, the first job is the outer wheel house. First job is to cut the quarter further up to give me access to the full flange.
Image

I wanted to do the repairs to the inner panel first, getting it structurally sound before removing/attaching the new outer wheel house. To make this easier I trimmed off the bulk of the panel. I had a leave a large chunk intact at the front, where I previously did my own patch work. This will need carefull removing.
Image

I could see that the rear section of the inner panel was a bit rusted, so I needed to start removing some of the remains of the outer panel to see how much would need replacing. A (un)welcome return of the spot weld cutter...
Image

Thankfully it was just the last few inches, so I was able to concentrate fully on the repairs to the inner panel. First off I dug out the replacement panel and primed it both sides in the area I'd be cutting out.
Image

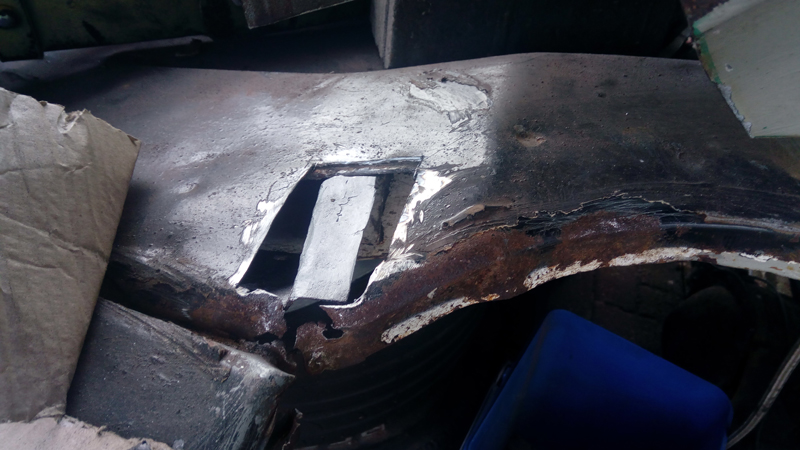
To make sure the patch would be the right size and fitment, I cut a card template from the new panel, using the indents as a guide. I could then offer it up to the old panel and make sure it was suitable fit.
Image
Image

Once happy, I marked where to cut on the donor panel, and then cut it out. This was then offered up to the old panel and a line drawn around it.
Image

This was then cut out, allowing me to see what repairs are needed behind it.
Image

Looks like as well as some of the tail panel lip needing some repairs, I'll have to do some work on the shock tower
Image


Till next time...


Top
   
PostPosted:Thu Jul 25, 2019 2:40 pm 
Offline
Big Block

Joined:Mon Mar 09, 2009 12:13 pm
Posts:205
Car Details:1979 Camaro
I'm overdue an update (again), so what I have been up to for the last 3 months?

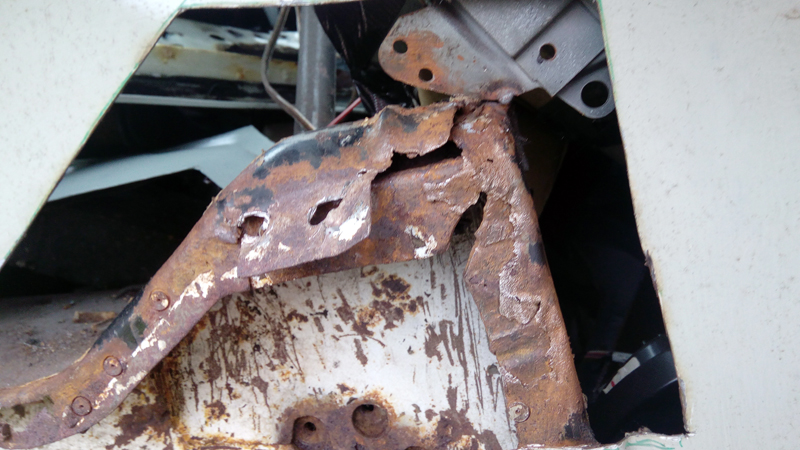
I closed off the last update looking at the rust hiding behind the inner quarter, and that was where I carried on. First job was to clean off the rough rust, which did make it look better, but it still needed repairing. Here we are part way through the dis-assembly.
Image

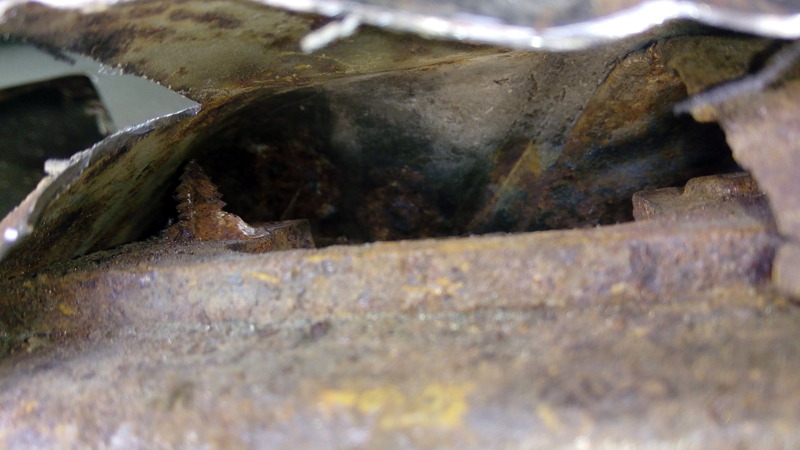
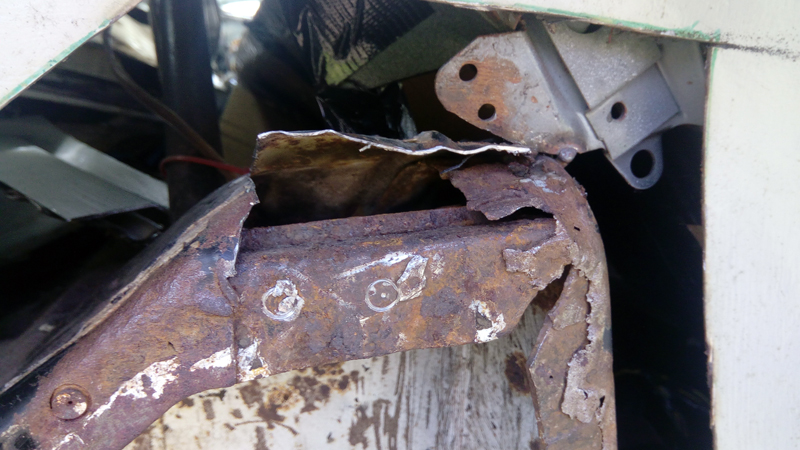
When I bought the car the passenger shock wasn't bolted in with the original bolts, but instead had semi-loose studs mounted in the shock tower, which had a tendency to spin when trying to loosen and tighten them, so I thought this would be a good time to fix that. My original assumption was the inner support had been stripped and one or both of the bolts weren't secure enough. I tested this and found the front was OK and would accept an original bolt, but the rear was not just loose, but the hole was much bigger. Once I'd clean off most of the rust, I chopped the top of the tower to get some access inside, but I wasn't expecting to find this:
Image
Image

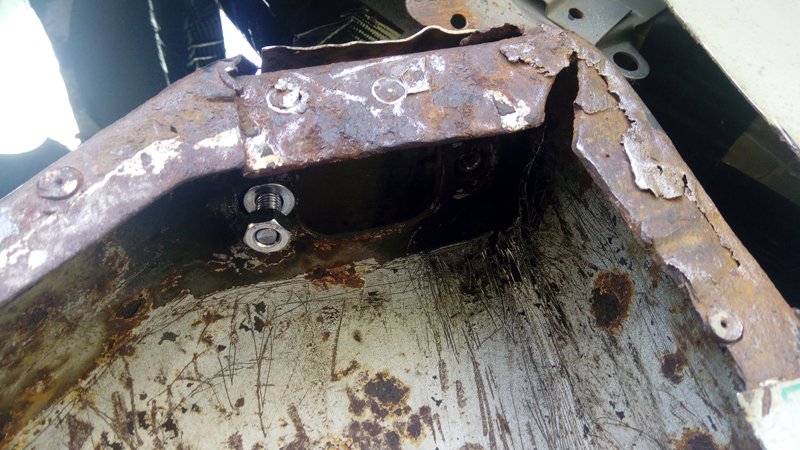
The original bolt had clearly siezed and I guess snapped off. They've then drilled up through it, leaving part of the old bolt there. I set about resolving this by cutting the remainder of the bolt out, sliding a new bolt in from the top and welding it in place. In hindsight I don't think it's the best solution, but I'm committed to it now.
Image

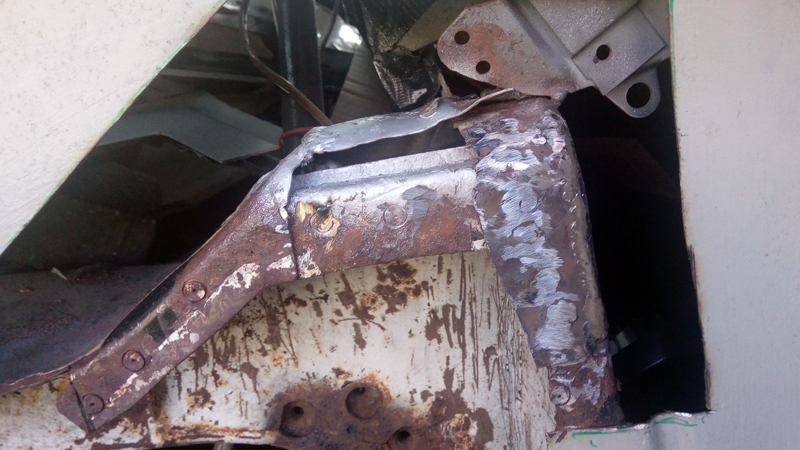
With that done, the repairs to the shock tower had 3 phases - 1. weld up the top flap, 2. repair the front section, which is an extension of the rear seat back panel (not sure what the proper name for that one is). Here we are at that stage:
Image

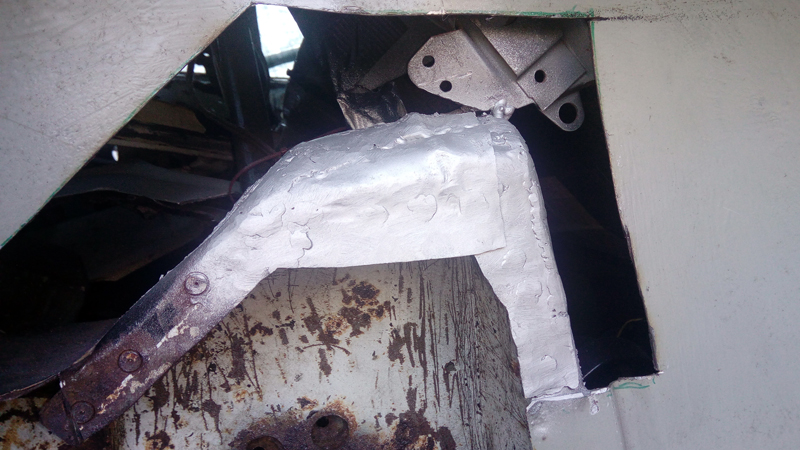
The 3rd phase was the replace the top/outer part of the tower. I had the spare tower from the other side spare (I cut the rear section of the rail out for the earlier repairs). Although the other side, it was fairly close in profile and needed minimal work to get it to fit. It's not the tidiest of repairs, but it's not going to be seen where it is.
Image

With that done, I moved onto the small patches along the edge of the trunk floor.
Image

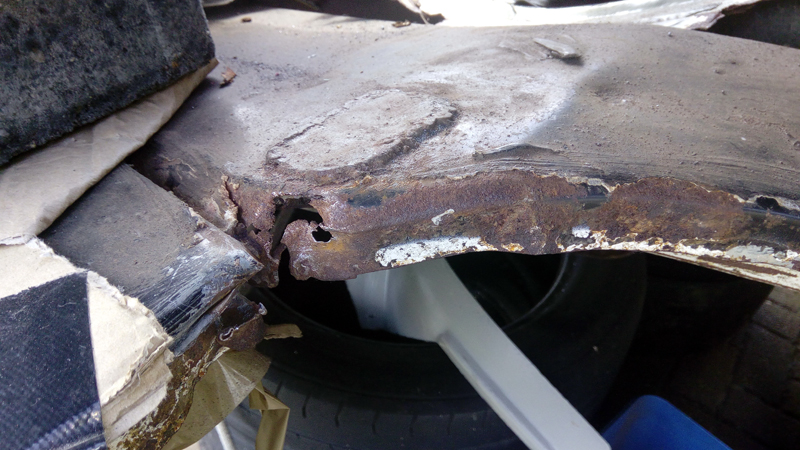
One of the rough spots was above the support piece, where I'd previously made some pretty rough repairs (from inside the trunk).
Image

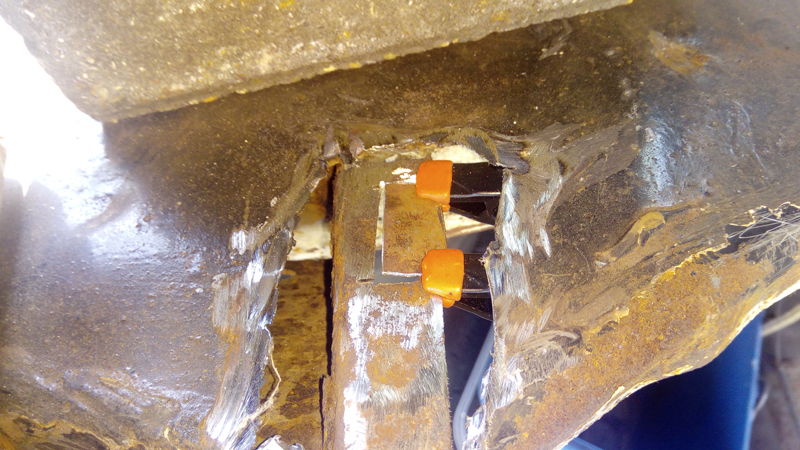
The old patch was cut out, revealing the support piece, which also needed some repair. Here the thin spot has been removed and I'm ready to weld in the replacement and then the same after it was in and cleaned up.
Image
Image

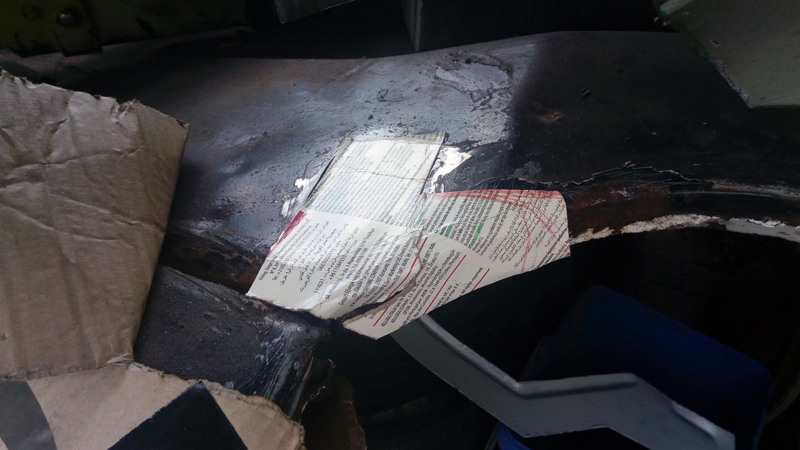
Then I worked on the trunk floor again, initially working out a patch shape with card, and cut/shaped a piece to match it.
Image
Image

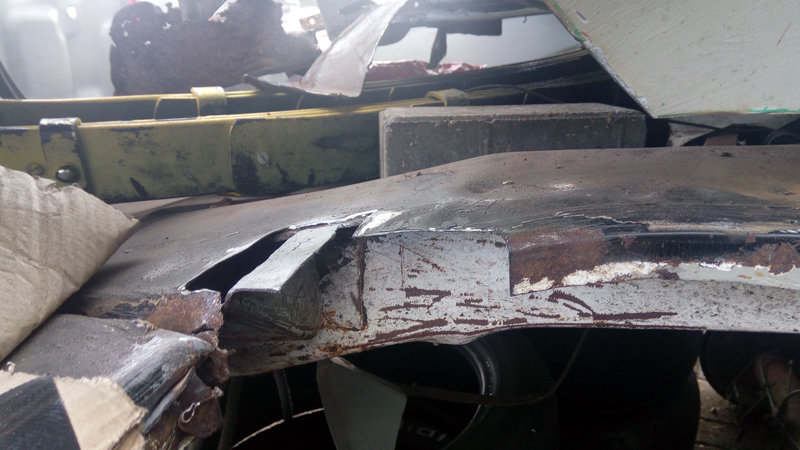
Once I'd got the patch piece ready, I then knew how much to cut out. There is still a rough edge on the left, but this is behind the trunk drop off, so I'll deal with that later.
Image

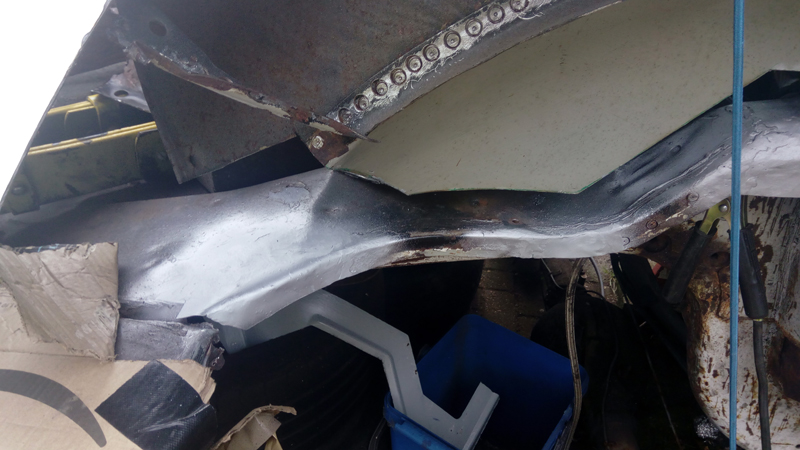
And here we are with the patch welded in and cleaned up.
Image

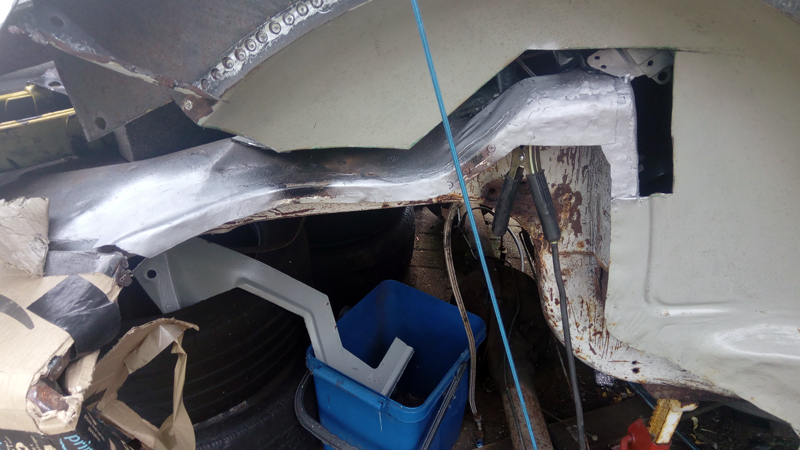
Body side repairs for the inner quarter panel now complete :-)
Image

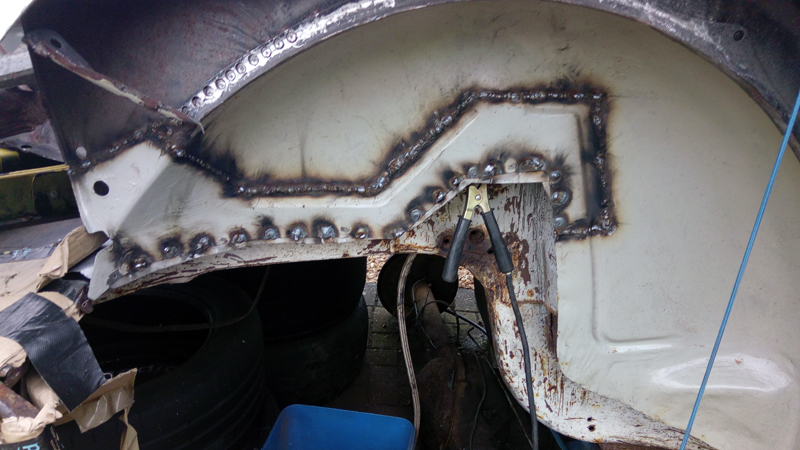
Now it was back to the inner quarter panel itself. Another test fit showed it wasn't as well cut as I thought, but was close enough to work with. I started by marking where I wanted to spot weld, then cut the holes.
Image
Image

A couple of hours later and it's welded in.
Image

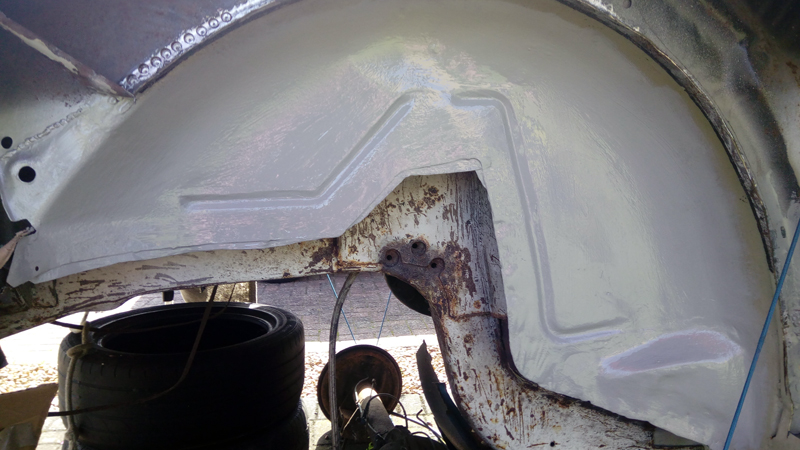
Cleaned up and epoxied - one of my best jobs to date, virtually no sign of work being done:
Image

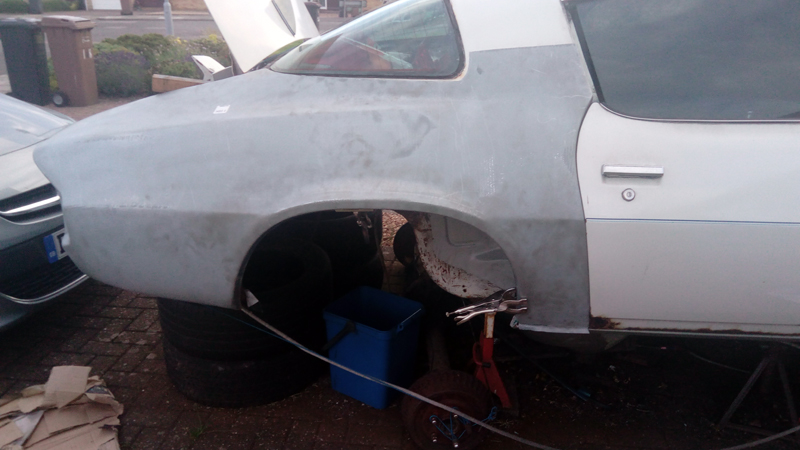
After that, I spent a couple of hours drilling out the spot welds around the arch and cleaning up the surface behind it. From experience on the other side, I knew that I need to align the outerwheel house and the quarter panel at the same time, I had to dig the quarter skin out and do some prep on that too.

I had to trim the front lower corner a few times, to get it to sit down low enough, but I managed to get it aligned fairly quickly. The crease line is a fraction high here, but will be easy to massage down when being fitted properly. I also noted the passenger door is a few mm low anyway.
Image
Image

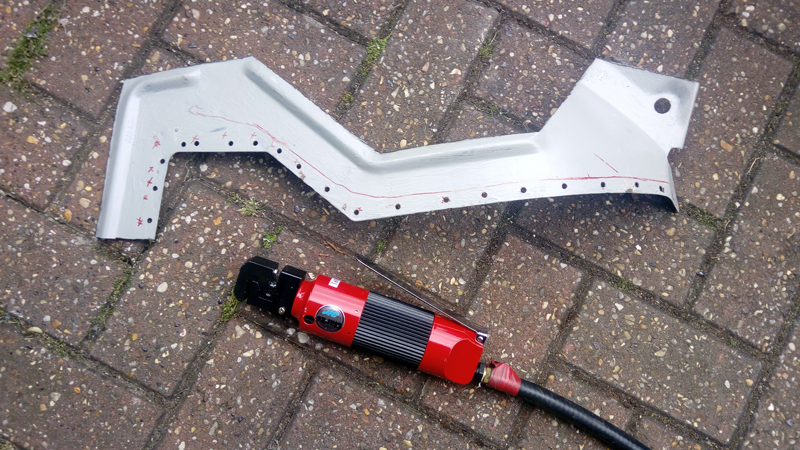
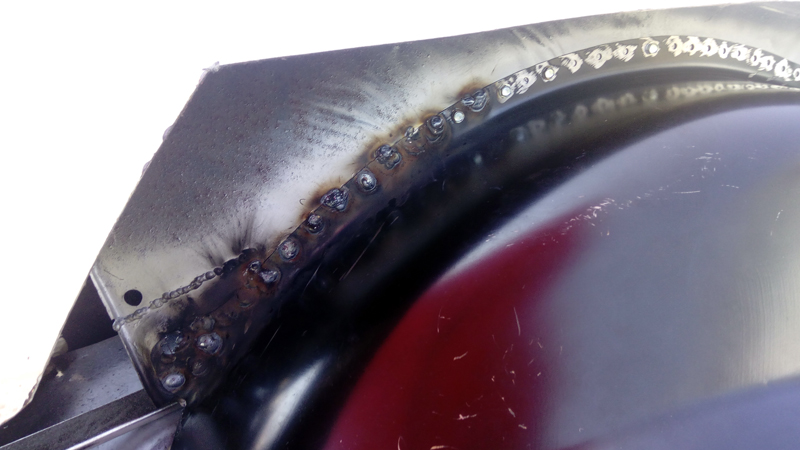
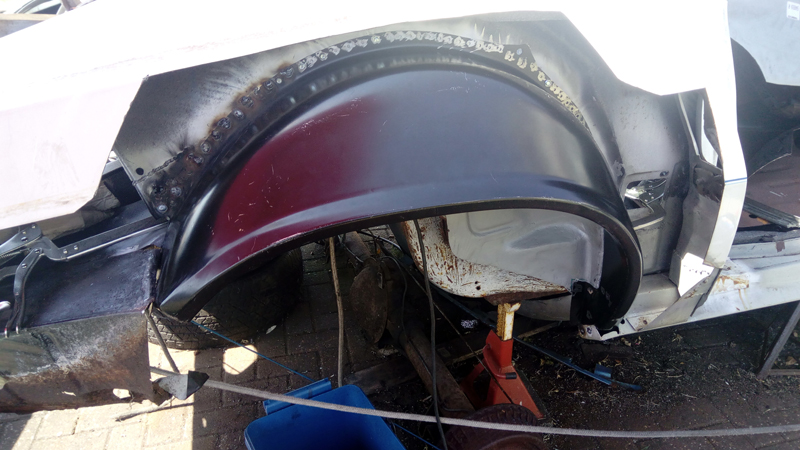
Happy with that I proceded to punch out a ton of holes on the wheel house, clean it off for welding, clamp in place and weld away. Ran out of time to complete the job today, but made a good start.
Image
Image


Till next time, hopefully not in 3 months...


Top
   
Display posts from previous: Sort by 
Post new topic Reply to topic  [57 posts ]  Go to pagePrevious123456

All times are UTC


Who is online

Users browsing this forum: No registered users and 3 guests


You cannot post new topics in this forum
You cannot reply to topics in this forum
You cannot edit your posts in this forum
You cannot delete your posts in this forum
You cannot post attachments in this forum

Search for:
Jump to:  
cron
Powered by phpBB® Forum Software © phpBB Limited