The Camaro Club (UK)

Online Community for all Camaro Owners and enthusiasts
It is currently Fri Nov 01, 2024 10:23 pm

All times are UTC


Post new topic Reply to topic  [456 posts ]  Go to pagePrevious1161718192046Next
Author Message
 Post subject: Re: '79 project
PostPosted:Tue Jul 08, 2014 12:48 am 
Offline
Big Block
User avatar

Joined:Tue Feb 23, 2010 12:40 pm
Posts:3245
Car Details:'79 Camaro, 350 V8
Location:South Bucks
Quote:
always for a part you want quickly... bastids....
Lol yep, you know it. The proof is in the pudding - the same day i ordered the side spoilers, i ordered a full spoiler set for a trans am so that i could utilise the centre spoiler. That set arrived last thursday, from further away (Wisoncsin vs. Florida) and the salt in the wound is that the side spoilers cost twice as much to ship as the 3 piece spoiler set. Oh and the iodine on the salt on the wound is that the 3 piece spoiler was the same price and included all customs and import, so nothing to pay when it arrived, was all done at checkout. C'est la vie.

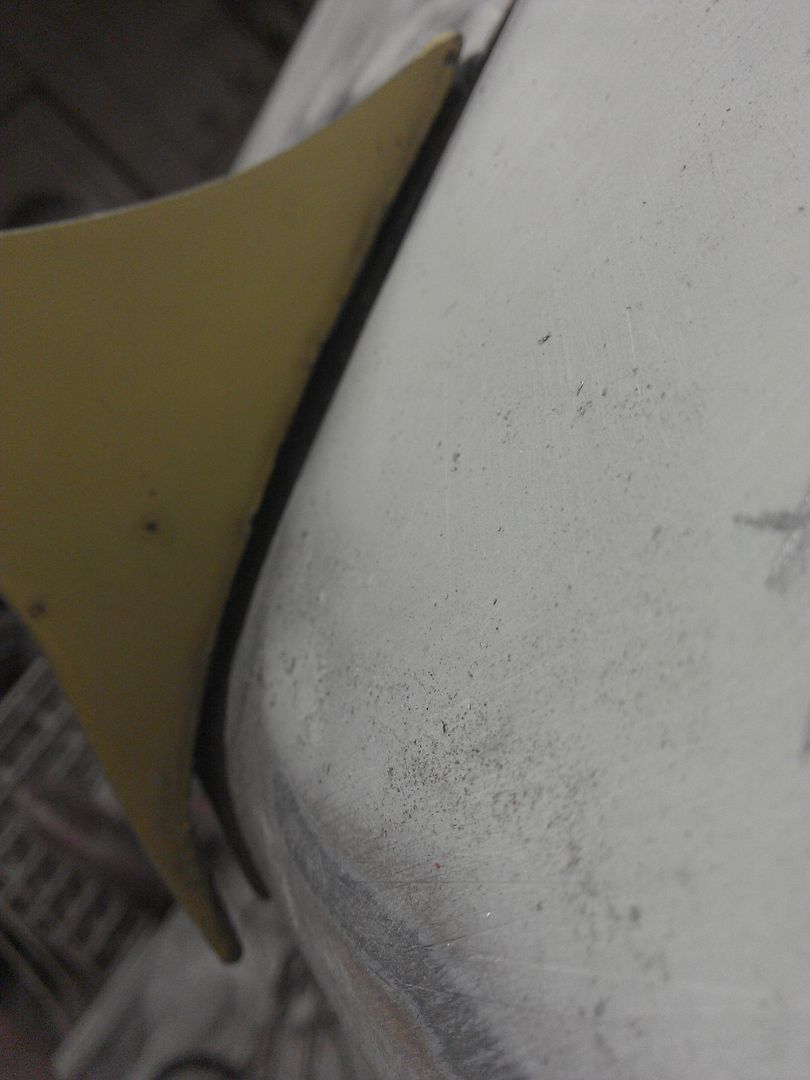
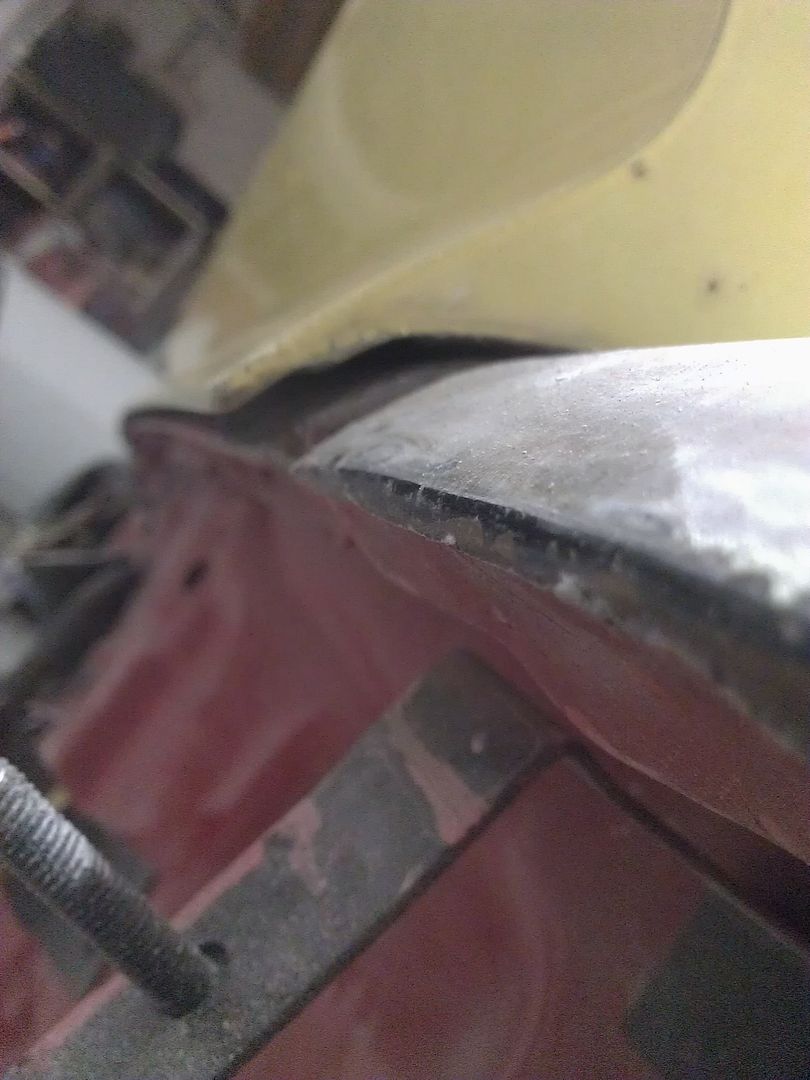
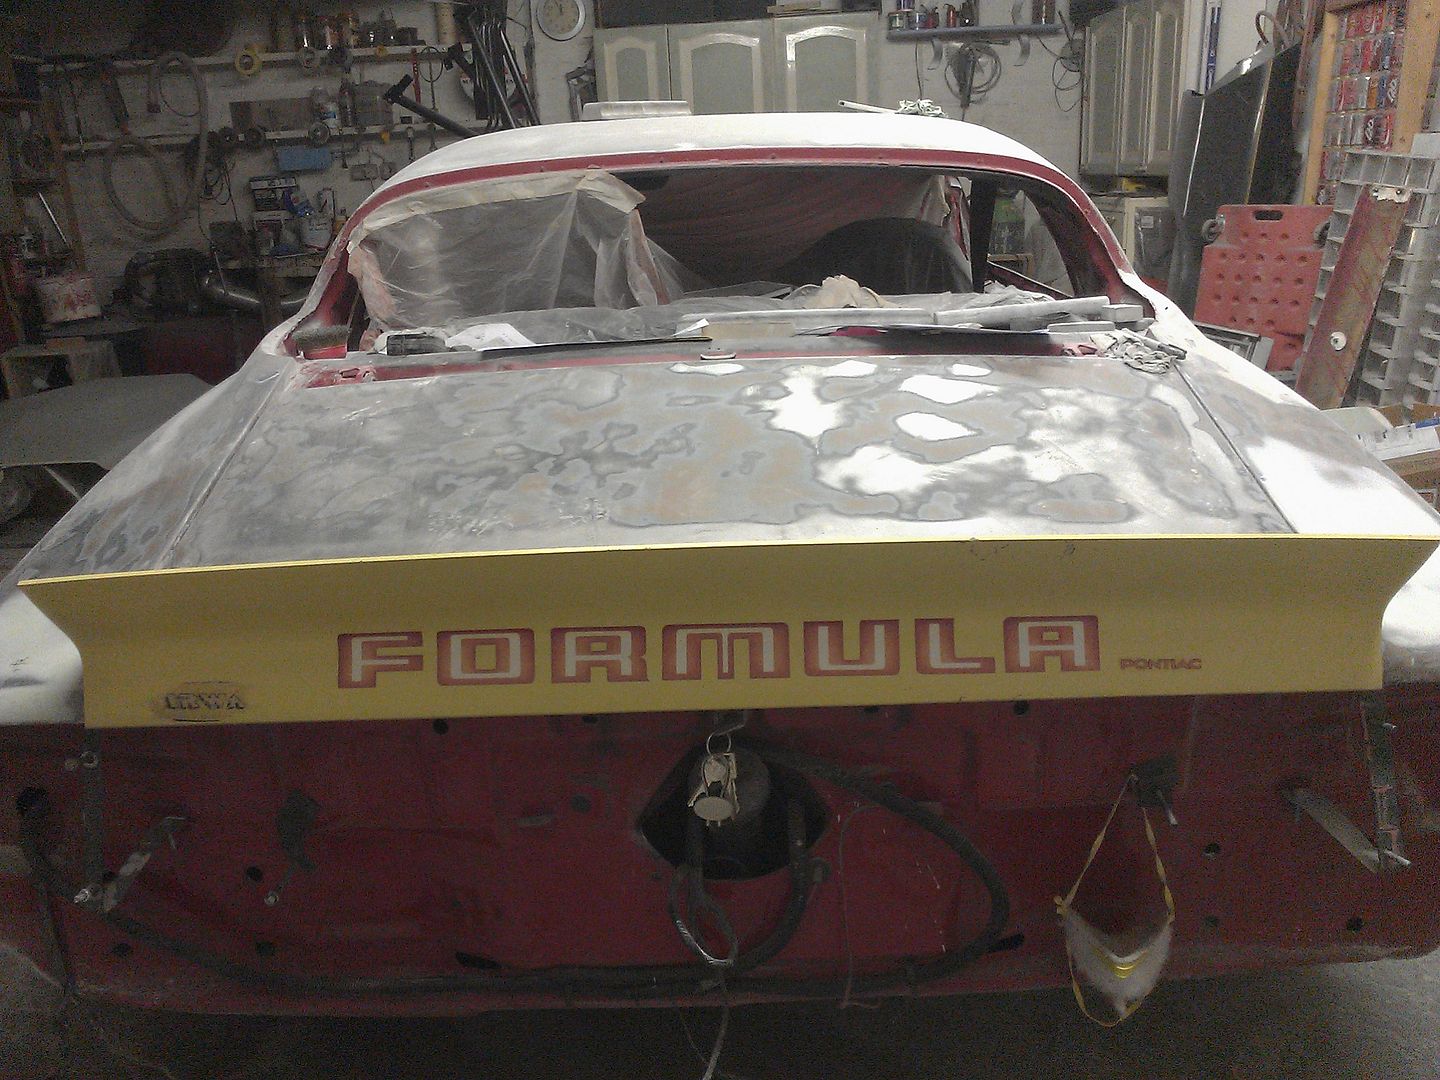
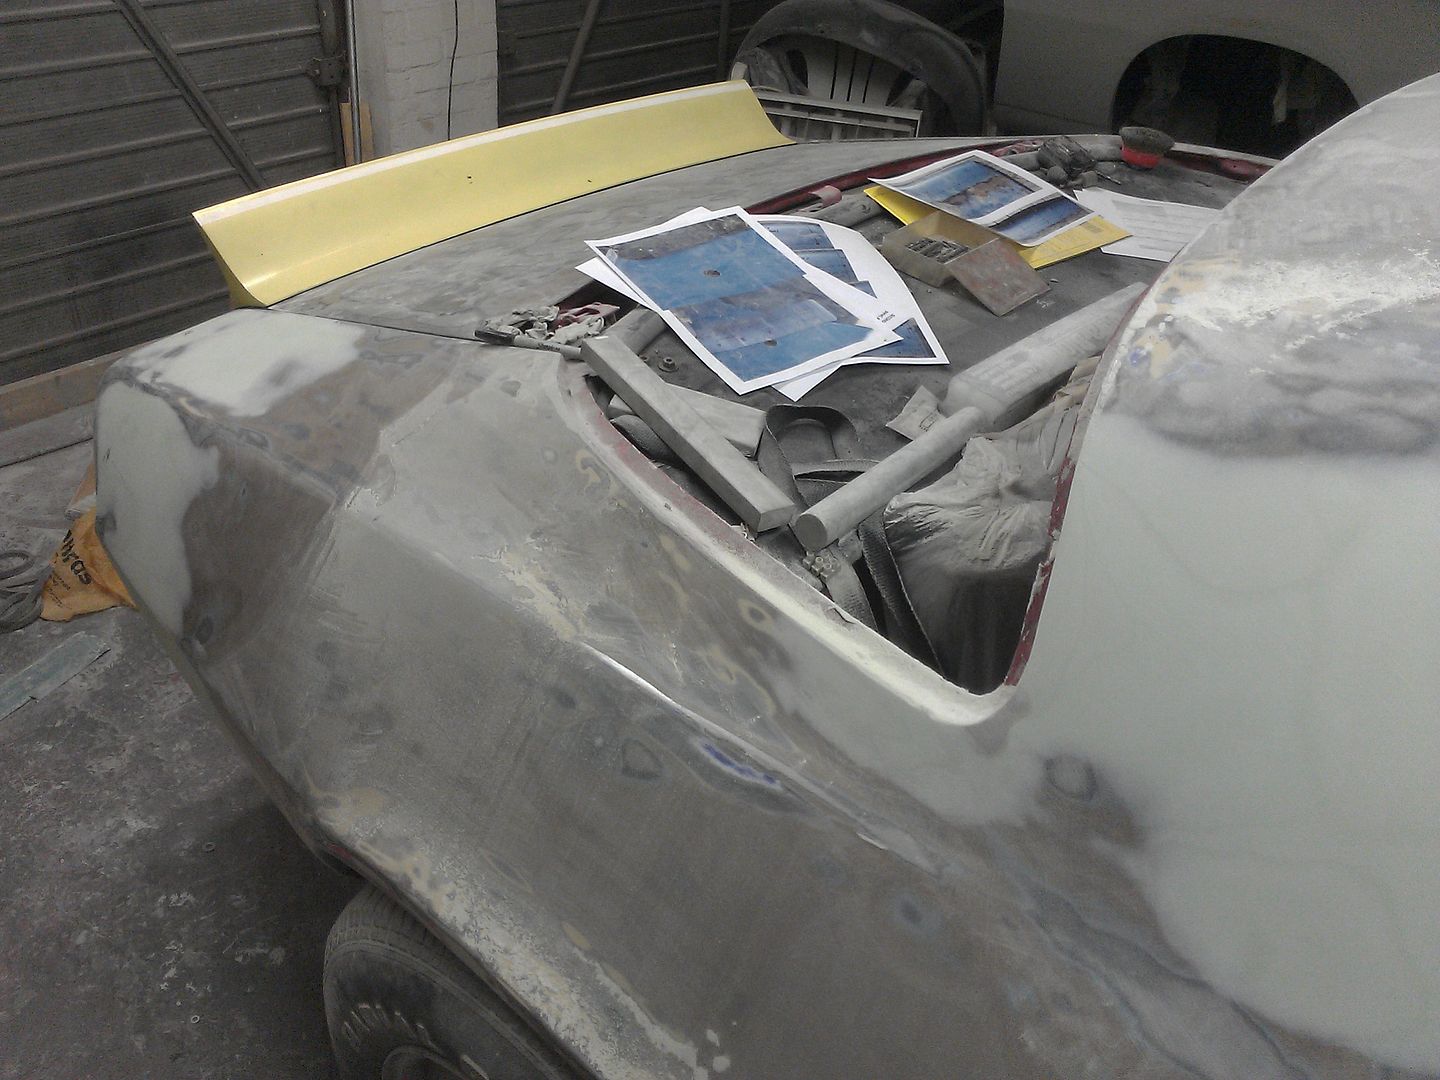
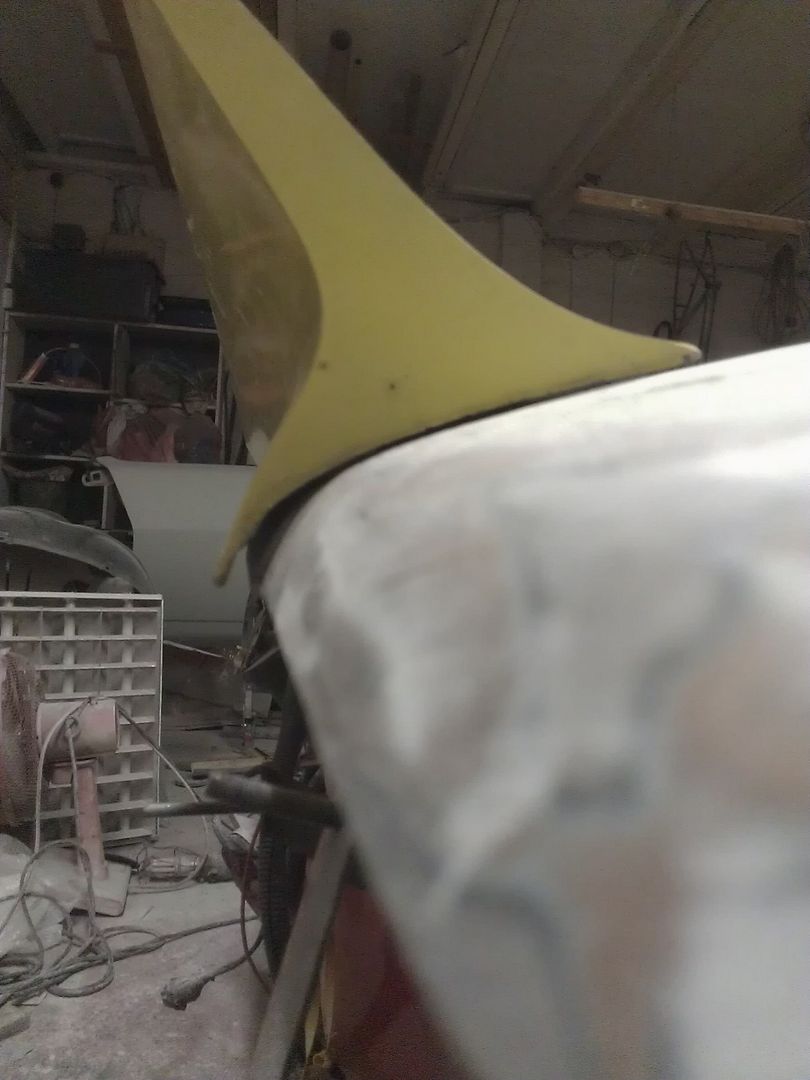
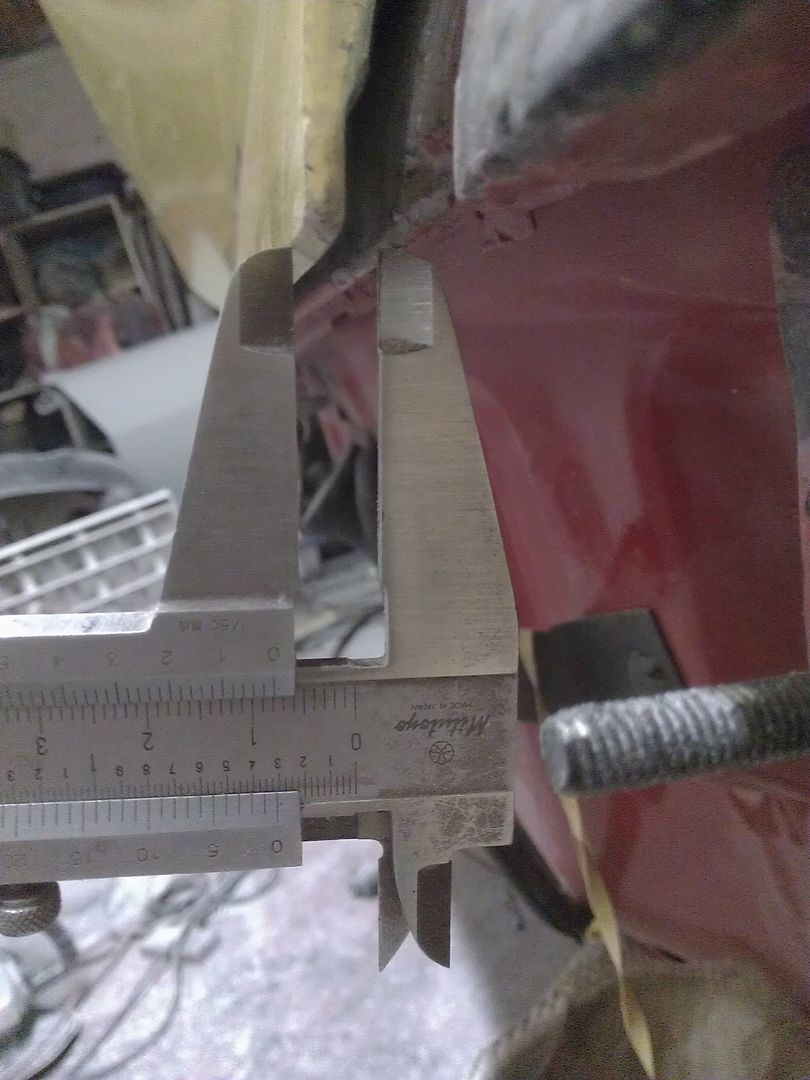
The work on the centre spoiler went like shite. Despite the instructions, the holes didn't match too well so had to elongate a few. Still not sure about the fit, seems to hang over the back a bit too much. Lip of the spoiler sticks out 0.8mm past the lip of the trunk lid, pics below. Not sure if this is right? Don't mind spending more time on it to get it sorted before it's too late.
Quote:
Sounds like you're really getting stuck in now and on to the final leg of prep
Yes you're very right! I've called off all social events for the month, so it's going to be a sad existence for the next month or so. Otherwise it won't be done this summer. I'm already behind schedule from the plan i put together. I was supposed to have primered it on Sunday. My plan B was to have the spoilers fitted by today and have them sanded by tomorrow. Not gonna happen :( The revised plan shows that even primer by next Sunday may not happen :( Have been u till 3am a few nights on work nights, not sure where all the time is disappearing!

Too much gap?
Image

Image

Image

Image

Image

Image

_________________
How to post pics: When writing a message, scroll down and use the "attach file" option. Where possible, a photo sharing service can be used such as Flickr, Imgur etc. The image location (usually ending in .jpg) can be copy and pasted between the ][ brackets that appear when you click the 'Img' button (you can find this button at the top of the message box).

How to post youtube vids: Click on the 'youtubeHD' button at the top of the message box and in the middle of the ][ brackets that just appeared, copy and paste everything from the youtube web address that appears after the = sign i.e if this is the url: https://www.youtube.com/watch?v=K2cNqaPSHv0 just copy "K2cNqaPSHv0").


Top
   

Re: '79 project

Sponsor

Sponsor
 

 Post subject: Re: '79 project
PostPosted:Tue Jul 08, 2014 7:15 pm 
Offline
Big Block
User avatar

Joined:Tue Feb 23, 2010 12:40 pm
Posts:3245
Car Details:'79 Camaro, 350 V8
Location:South Bucks
Got the letter through from parcelforce, paid the customs (£17) :roll: They can't deliver tomorrow, so will be thursday after work when i can get hold of them.

Can't for the life of me find any pics of rear spoilers on 2nd gens, from a lower / closer view, to see what the gap should be like. Searched until 2am last night and found nothing :x

Plan for tonight is to get the driver door sorted. Noticed a couple of waves and pinholes in it from when i used paint stripper to pull all of the coats of paint off. Would have been good to get the spoiler sorted tomorrow / day after. Guess tomorrow i will work on smoothing out the trunk, with the spoilers being the last thing on the list to sort out.

_________________
How to post pics: When writing a message, scroll down and use the "attach file" option. Where possible, a photo sharing service can be used such as Flickr, Imgur etc. The image location (usually ending in .jpg) can be copy and pasted between the ][ brackets that appear when you click the 'Img' button (you can find this button at the top of the message box).

How to post youtube vids: Click on the 'youtubeHD' button at the top of the message box and in the middle of the ][ brackets that just appeared, copy and paste everything from the youtube web address that appears after the = sign i.e if this is the url: https://www.youtube.com/watch?v=K2cNqaPSHv0 just copy "K2cNqaPSHv0").


Top
   
 Post subject: Re: '79 project
PostPosted:Wed Jul 09, 2014 3:12 am 
Offline
Big Block
User avatar

Joined:Tue Feb 23, 2010 12:40 pm
Posts:3245
Car Details:'79 Camaro, 350 V8
Location:South Bucks
I am so tired :tired: :yawn:

_________________
How to post pics: When writing a message, scroll down and use the "attach file" option. Where possible, a photo sharing service can be used such as Flickr, Imgur etc. The image location (usually ending in .jpg) can be copy and pasted between the ][ brackets that appear when you click the 'Img' button (you can find this button at the top of the message box).

How to post youtube vids: Click on the 'youtubeHD' button at the top of the message box and in the middle of the ][ brackets that just appeared, copy and paste everything from the youtube web address that appears after the = sign i.e if this is the url: https://www.youtube.com/watch?v=K2cNqaPSHv0 just copy "K2cNqaPSHv0").


Top
   
 Post subject: Re: '79 project
PostPosted:Wed Jul 09, 2014 12:57 pm 
Offline
Big Block
User avatar

Joined:Tue Feb 23, 2010 12:40 pm
Posts:3245
Car Details:'79 Camaro, 350 V8
Location:South Bucks
So here's what happened. The drivers side door had some imperfections that you could notice when running your hand over it. Bearing in mind, i had already painted the car before and it looked fine (will find a pic tonight but there's one earlier in this thread where you can see it). I then stripped the layers of paint off it, used a scraper to help get the paint off and sanded down the panel with 80. There were some pinholes and a couple of bumps that in noticed. This was at the end of last year.

So last night, i intended to skim over the areas where there were bumps. I ended up skimming the whole panel, upper and lower. Sanded, filled low spots, sanded, filled low spots, repeat, repeat. Pretty much got there. There was low spot left on the rear side of the door, just about noticable when running your hand over it. I gave it a skim and at 3am decided i couldn't wait for it to cure to sand it down. Which was kind of annoying because i would have at least liked to have gone to bed knowing the bottom half of the door was done. The top half is mostly there - i just need to run some masking tape across the body line and sand down to it, to see if there are any low spots there. Want to finish the bottom half first, then masking tape the bottom, then do the top half. Guess what i'll be doing tonight.

Was hoping to get the door done yesterday, so that i could do the decklid and centre spoiler tonight. This sucks. :| :yawn: :tired:

_________________
How to post pics: When writing a message, scroll down and use the "attach file" option. Where possible, a photo sharing service can be used such as Flickr, Imgur etc. The image location (usually ending in .jpg) can be copy and pasted between the ][ brackets that appear when you click the 'Img' button (you can find this button at the top of the message box).

How to post youtube vids: Click on the 'youtubeHD' button at the top of the message box and in the middle of the ][ brackets that just appeared, copy and paste everything from the youtube web address that appears after the = sign i.e if this is the url: https://www.youtube.com/watch?v=K2cNqaPSHv0 just copy "K2cNqaPSHv0").


Top
   
 Post subject: Re: '79 project
PostPosted:Thu Jul 10, 2014 6:00 am 
Offline
Big Block
User avatar

Joined:Mon Feb 09, 2009 12:41 pm
Posts:2451
Don't you just love bodywork??? welcome to my world of pain :lol: :lol:

cheers..Nige

_________________
Too much power...not enough hands!!


Top
   
 Post subject: Re: '79 project
PostPosted:Thu Jul 10, 2014 2:21 pm 
Offline
Big Block
User avatar

Joined:Fri Mar 19, 2010 1:35 am
Posts:2566
Car Details:79' camaro road & track day toy. 383 stroker, 5 speed TKO trans, lots of suspension stuff, 13" Vette brakes, 18" wheels.
Location:Luton
Keep the faith...... :!:

_________________
“You only live once, but if you do it right, once is enough.”


Top
   
 Post subject: Re: '79 project
PostPosted:Thu Jul 10, 2014 6:39 pm 
Offline
Big Block

Joined:Thu Jul 21, 2011 2:16 pm
Posts:815
Car Details:1980 2nd Gen, 6.0 iron block LS, 4.11 12 bolt axle, Brute Strength Posi, Lowered 2", sub frame connectors, G-braces, Carbon hood and front bumper cover
Location:Norfolk
When it stops raining I'll get some pics of my spoiler fitment. I would say that if it looks OK from the top and all 3 bits line up properly I wouldn't worry too much about the gap underneath - you cant see it anyway! :thumbup:

_________________
My '80 progress thread - hugger orange! Now with LQ9 power - forged pistons, LS2 rods, 236/242, .621/.612, flowed and milled 317 heads. MS3X

4L80e, 12 bolt, 4.11, Moroso brute strength posi, steel shafts.

Subframe connectors, g-braces, solid body bushes, carbon hood and front bumper, custom door cards, Autometer gauges.


Top
   
 Post subject: Re: '79 project
PostPosted:Fri Jul 11, 2014 1:20 am 
Offline
Big Block
User avatar

Joined:Tue Feb 23, 2010 12:40 pm
Posts:3245
Car Details:'79 Camaro, 350 V8
Location:South Bucks
@Nige - Don't know how you do it, and how you've done it for so long!!

@Stu - thanks for the encouragement! Running on fumes at this point, physically and mentally :yawn:

I've seen a couple of project cars on ebay - 2nd gens and strangely despite what's going on, i'm saying to myself that i wish i had space so that i could make a living off restoring them! Must be all the chemicals getting to me...

@David - Thanks i'd very much appreciate that! It will help me to see how it should look, before i start drilling any more holes / elongating existing ones. Not very summery weather is it :(

The side spoilers arrived today and i finished the door last night. Had a prior engagement tonight that i couldn't cancel, so it was my rest evening in a sense, onto the trunk lid and spoilers Friday evening. Sanded down some of the centre spoiler yesterday, while waiting for filler to cure, so that's gotten things ahead a bit for Friday.

Also, found this in the assembly manual. All the factory measurements. Don't know why i didn't think to check this!! Will be checking these measurements against the existing ones tomorrow. Not that i can make any sense of the numbers in the below. Should be a simple geometric diagram instead? Lord knows how they were able to create the holes at the factory based on the below pic :think:

Image

_________________
How to post pics: When writing a message, scroll down and use the "attach file" option. Where possible, a photo sharing service can be used such as Flickr, Imgur etc. The image location (usually ending in .jpg) can be copy and pasted between the ][ brackets that appear when you click the 'Img' button (you can find this button at the top of the message box).

How to post youtube vids: Click on the 'youtubeHD' button at the top of the message box and in the middle of the ][ brackets that just appeared, copy and paste everything from the youtube web address that appears after the = sign i.e if this is the url: https://www.youtube.com/watch?v=K2cNqaPSHv0 just copy "K2cNqaPSHv0").


Top
   
 Post subject: Re: '79 project
PostPosted:Sun Jul 13, 2014 7:29 pm 
Offline
Big Block

Joined:Thu Jul 21, 2011 2:16 pm
Posts:815
Car Details:1980 2nd Gen, 6.0 iron block LS, 4.11 12 bolt axle, Brute Strength Posi, Lowered 2", sub frame connectors, G-braces, Carbon hood and front bumper cover
Location:Norfolk
Here ya go Ray, fitted these with the measurements in the link. The measurements in that were taken from a factor spoiler car.

Image

Image

Image

Image

_________________
My '80 progress thread - hugger orange! Now with LQ9 power - forged pistons, LS2 rods, 236/242, .621/.612, flowed and milled 317 heads. MS3X

4L80e, 12 bolt, 4.11, Moroso brute strength posi, steel shafts.

Subframe connectors, g-braces, solid body bushes, carbon hood and front bumper, custom door cards, Autometer gauges.


Top
   
 Post subject: Re: '79 project
PostPosted:Tue Jul 15, 2014 11:49 am 
Offline
Big Block
User avatar

Joined:Tue Feb 23, 2010 12:40 pm
Posts:3245
Car Details:'79 Camaro, 350 V8
Location:South Bucks
Thank you David, those are the exact angles i was hoping for, very much appreciated :) I see that it didn't stop raining over there either! I moved the spoiler inbound towards the front of the car some more, now it sits snuggly and almost against the little bumpers that are in the spoiler. Got the pass side fitted too, took some elongating of the holes but not too badly. That one fits perfectly along the quarter bodyline and against the centre piece. The drivers side isn't happy. It either sits too far back or at angle - facing slightly outwards and at an upward angle against the quarter panel line. Not even subtely, quite noticably. When i get it sitting correctly and hold it in place, as soon as i start tightening the bolts down it start moving away from where it should be. So strange and can't figure out why. Have elongated the holes a fair bit and looking underneath, there is still adjustment room, it's almost as if the spoiler or quarter are slightly differently shaped :eh:

Fitting aside, the centre piece is now filled and sanded down, as are the sides. Was working on the trunk lid last night but got to 12:30 am and was almost falling asleep. Sanded and filled a couple of time, so it appears to be mostly there now. It's more of a skim across the whole lid as it was pretty flat already, one area was a bit low and there's no way to get underneath it as there are only a couple of small access holes, but they are on the other side of the trunk lid. Fingers crossed i can finish the trunk lid tonight, then a touch of filler needed on the rear quarter that i noticed yesterday. That will complete the rough sanding on the shell, so really hoping to get that sorted tonight.

Then onto prepping the mirrors, then final sanding, to get rid of the 80 grit scratches. I must add some pics...

_________________
How to post pics: When writing a message, scroll down and use the "attach file" option. Where possible, a photo sharing service can be used such as Flickr, Imgur etc. The image location (usually ending in .jpg) can be copy and pasted between the ][ brackets that appear when you click the 'Img' button (you can find this button at the top of the message box).

How to post youtube vids: Click on the 'youtubeHD' button at the top of the message box and in the middle of the ][ brackets that just appeared, copy and paste everything from the youtube web address that appears after the = sign i.e if this is the url: https://www.youtube.com/watch?v=K2cNqaPSHv0 just copy "K2cNqaPSHv0").


Top
   
Display posts from previous: Sort by 
Post new topic Reply to topic  [456 posts ]  Go to pagePrevious1161718192046Next

All times are UTC


Who is online

Users browsing this forum: No registered users and 9 guests


You cannot post new topics in this forum
You cannot reply to topics in this forum
You cannot edit your posts in this forum
You cannot delete your posts in this forum
You cannot post attachments in this forum

Search for:
Jump to:  
cron
Powered by phpBB® Forum Software © phpBB Limited